Consul基本使用

前言
官网介绍Consul是一个分布式服务网格(Service Mesh)解决方案…
而我目前的理解是提供了分布式系统中的服务发现和配置解决方案, 使用go实现, 目前在github的star是15k, 远超Netflix Eureka
关于Consul的架构, 功能, 对比都可参考官网, 建议阅读:
- What is Consul?
- Consul vs. Other Software
目的
- 部署启动consul开发环境 —— dev
- Spring Cloud Consul 基本使用
- consul中的服务发现
- consul中的配置中心
- consul集群部署 (下节)
下载&启动
进入下载地址 下载对应的版本即可, 解压即得到可执行文件
这里我下载最新版1.4.4, 在Windows测试单机开发环境, 在Linux环境测试consul集群部署
进入命令行:
验证版本:
consul --version1
2
3
λ consul --version
Consul v1.4.4
Protocol 2 spoken by default, understands 2 to 3 (agent will automatically use protocol >2 when speaking to compatible agents)
启动:
consul agent -dev
正常启动后, 打开 http://127.0.0.1:8500 可以看到consul提供的UI, 长这个样子
上述方式重启不会保存数据, 可以加入数据持久的参数
1
$ consul agent -server -bootstrap -advertise 127.0.0.1 -data-dir ./data -ui
关于Consul的操作, 常用有两种方式: CLI和UI, 后面会演示部分用法
Spring Cloud Consul
介绍: 略…
依赖
可以选择这个all
12
3
4
<dependency><groupId>org.springframework.cloud</groupId>
<artifactId>spring-cloud-starter-consul-all</artifactId>
</dependency>
上面的all包含了以下三个依赖
12
3
4
5
6
7
8
9
10
11
12
13
14
<dependencies><dependency>
<groupId>org.springframework.cloud</groupId>
<artifactId>spring-cloud-starter-consul-bus</artifactId>
</dependency>
<dependency>
<groupId>org.springframework.cloud</groupId>
<artifactId>spring-cloud-starter-consul-config</artifactId>
</dependency>
<dependency>
<groupId>org.springframework.cloud</groupId>
<artifactId>spring-cloud-starter-consul-discovery</artifactId>
</dependency>
</dependencies>
也可以根据实际需要选择引入
- consul-discovery: 服务注册和发现功能
- consul-bus: 消息总线,提供配置实时刷新,不再依赖中间件
- consul-config: 配置中心
健康检查
Spring Cloud Consul 默认会自动检查端点 /actuator/health
可以集成spring-boot-starter-actuator, 或者自定义这个端点:
12
3
4
@GetMapping("/actuator/health")public String health() {
return "OK";
}
从consul ui中可以看到检查结果
1
HTTP GET http://thank-pc:8801/actuator/health: 200 Output: OK
服务间调用
准备以下两个模块: consul-provider(服务提供者), consul-consumer(服务消费者)
consul-provider
1, 引入上述pom依赖
2, bootstrap.yml主要配置
12
3
4
5
6
7
spring:application:
name: consul-provider
cloud:
consul:
host: 127.0.0.1
port: 8500
3, 提供接口
测试用, 随便写
12
3
4
@GetMapping("getHello")public String getHello(@RequestParam String name) throws Exception {
return String.format("[%s:%s] Hello %s", InetAddress.getLocalHost().getHostName(), this.port, name);
}
consul-comsumer
1, 引入上述pom依赖
2, bootstrap.yml主要配置
12
3
4
5
6
7
8
9
spring:application:
name: consul-comsumer
cloud:
consul:
host: 127.0.0.1
port: 8500
discovery:
register: true # 默认就是true, consumer可以不注册的也可设为false
3, 调用consul-provider中的getHello()
这里用最常用的两种方式 RestTemplate || Feign
RestTemplate
1
2
3
4
5
6
@GetMapping("restTemplateInvoke")public ResponseEntity<String> restTemplateInvoke(@RequestParam String name) {
String url = "http://consul-provider/getHello?name=" + name;
String result = this.restTemplate.getForObject(url, String.class);
return new ResponseEntity(result, HttpStatus.OK);
}
Feign
1
2
3
4
5
6
7
8
9
10
11
12
@FeignClient("consul-provider")public interface HelloClient {
@GetMapping("getHello")
String getHello(@RequestParam String name);
}
@GetMapping("feignInvoke")
public ResponseEntity<String> feignInvoke(@RequestParam String name) {
String result = this.helloClient.getHello(name);
return new ResponseEntity(result, HttpStatus.OK);
}
测试
启动consul后, consul-provider启动两个实例, consul-consumer启动一个
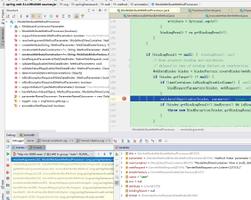
查看Consul UI, 确保服务注册成功
Consul UI service
测试一下consul-comsumer中的两个接口
GET http://localhost:8801/test/feignInvoke?name=thankGET http://localhost:8801/test/restTemplateInvoke?name=thank
从访问结果可以看到consul-consumer找到了两个服务提供者的实例, 并从中进行负载路由到其中一个
配置中心
从UI中能够看到, Consul也提供了配置中心的功能 —— Key/Value
规则
先进行一个简单的put和get
使用CLI
12
3
4
5
6
7
# put$ consul kv put name thank
Success! Data written to: name
# get
$ consul kv get name
thank
在Consul UI也能设置和查看
可以输入
consul kv --help, 查看其他几个子命令的说明
为了区分服务和profile, key支持目录分类(key or folder), 用/来区分, 例如:
12
3
4
$ consul kv put config/consul-provider/custom.address 北京$ consul kv get /config/consul-provider/custom.address
北京
同样, 在Consul UI也可以这样设置, 并以目录的形式展现
Spring Cloud Consul配置实践
在前面的pom依赖中能够看到其中的配置管理功能consul-config
与Spring Cloud Config不同的是, Consul中使用配置中心很简易
在动态刷新配置时, 也没有Spring Cloud Config中那样需要依赖消息中间件和集成Spring Cloud Bus那么麻烦
简单测试
简单测试配置属性的读取及动态刷新的功能
实际情况下应该有一个配置中心的, 这里测试为了方便, 就用consul-provider中的配置做实验
在配置文件
bootstrap.yml中加入一个自定义配置1
2
custom:
address: defaultAddress
在consul-provider中读取该属性
1
2
@Value("${custom.address}")public String address;
在Consul UI或命令行中添加一个配置
- key: config/consul-provider/custom.address
- value: 北京
接下来启动consul-provider和consul-consumer, 访问对应的API, 即可看到我们添加的配置生效了
试着在Consul UI中修改config/consul-provider/custom.address配置项的value值, 验证动态刷新
注意点
- 第1步是为了防止启动无该属性报错, 如果第3步提前配置了该属性, 那么第1步可以省略
- 为了测试动态刷新的功能, 别忘了在属性所在bean加上
@RefreshScope注释 - 注意优先级: 如果配置中心中的配置涉及到程序启动, 那么要放在
bootstrap.yml中, 而非application.yml, 这点与Spring Cloud Config一样
可能注意到consul配置项中key: config/consul-provider/custom.address 两个前缀是什么意思
- custom.address: 对应yaml文件中的属性
- consul-provider: 这个不用说了, 服务名
- config: Spring Cloud Consul中默认的前缀, 你可以修改它
具体可参考
org.springframework.cloud.consul.config.ConsulConfigProperties#prefix
测试多profile
实验多个profiles: default, dev, test
首先在consul中建立三个配置文件
default环境:
Key:consul-provider/data
Value:1
2
3
custom:
env: default
common: some common properties
dev环境
Key:consul-provider,dev/data
Value:1
2
custom:
env: dev
test环境
Key:consul-provider,test/data
Value:1
2
custom:
env: test
编写测试接口
12
3
4
5
6
7
8
9
10
11
12
13
14
15
16
@RestController@RequestMapping("config")
@RefreshScope
public class ConfigController {
@Value("${custom.env}")
private String env;
@Value("${custom.common}")
private String common;
@GetMapping("getEnv")
public String getEnv() {
return "Environment: " + this.env + "
Common: " + this.common;
}
}
在 bootstrap.yml 中加入如下配置:
12
3
4
5
6
7
8
spring:cloud:
consul:
config:
# default-context: consul-provider
format: YAML
profiles
active: dev
分别指定不同的 spring.profiles.active, dev or test or none
观察 curl localhost:8901/config/getEnv 的结果, 试着更改配置项的值, 验证动态刷新
规则&配置总结
两种键值类型
- key/value: 默认方式, 键值一一对应, 上述[简单测试]演示的就是这种
- 值为properties或yaml: [测试多profile]演示的是这种
常用配置
列举几个Spring Cloud Consul配置中心相关的常用配置项
在上面的示例中, 基本都使用了Spring Cloud Consul中的默认配置
相关配置项参考:
org.springframework.cloud.consul.config.ConsulConfigProperties
实际使用中可能需要修改, 常用的配置项列举:
拿一个上面的配置对照: config/consul-provider,test/data
spring.cloud.consul.config.*)default-context
指定应用名
application
prefix
folder前缀
config
profile-separator
环境分隔符
,
format
枚举类型, 还支持PROPERTIES, YAML, FILES
KEY_VALUE
data-key
当format是properties或yaml时, 将以该值作为key去寻找对应配置
data
watch.*
与配置刷新相关的
读取规则
通过前面的演示, 基本也能猜出大概的规则, 例如test环境会读取 config/consul-provider,test/data 对应的值
有一点需要注意, 在上面[测试多profile]中, 示例只在config/consul-provider/data中配置了custom.common, 指定test或dev环境后, 该配置也能读出来
从这可以看出consul-provider,xxx与consul-provider中的配置值经过了合并, 这与Spring Cloud Config一样
把各环境都一样的配置写在这个默认会被读取的配置中是个不错的选择
关于default-context配置项, 默认为application, 在上面的实验中, 在 consul-provider 项目中, 没有配置 default-context,
也能找到配置中心对应的consul-provider,xxx配置, 这与Spring Cloud Config中{name}-{profile}.yml: 服务名-环境名的寻找规则一样
即默认就会去找服务名对应的配置项, 如果配置中心的配置与服务名不同, 也支持你将default-context设置成非服务名
如果配置中心中存在application配置, 例如config/application/data, 那么所有应用都会加载到它中的配置, 同样适合做一些所有应用都公共的配置项
优先级
如果某个配置项, 例如custom.common, 存在与以下四个配置中
config/{appname},dev/dataconfig/{appname}/dataconfig/application,dev/dataconfig/application/data
如果指定profile=dev, 三者之间的优先级为从上至下由高到低
配置刷新原理
在配置刷新原理上, Spring Cloud Config中实现动态刷新的原理是用消息队列和bus实现以消息总线的方式进行通知配置信息的变化,
完成集群上的自动化更新和批量配置属性刷新.
Spring Cloud Consul 采用的是客户端定期通过watch检测consul中配置的变化, 然后触发 Spring RefreshEvent 刷新上下文
参考文档
- spring-cloud-consul-config
以上是 Consul基本使用 的全部内容, 来源链接: utcz.com/z/511484.html