如何在Ubuntu 18.04上安装Drupal
Drupal是全球最受欢迎的开源CMS平台之一。它是用PHP编写的,可用于构建各种类型的网站,从小型个人博客到大型企业,政治和政府网站。
在本教程中,我们将向您展示如何在Ubuntu 18.04计算机上安装Drupal 8.6。有多种安装Drupal的方法。本教程介绍了使用称为Drupal-project的Drupal项目的Composer模板安装Drupal 8.6的必要步骤。
我们将使用Nginx作为网络服务器,使用最新的PHP 7.2和MySQL / MariaDB作为数据库服务器。
先决条件
在继续本教程之前,请确保满足以下先决条件:
- 您的域名指向您的公共服务器IP。我们将使用
example.com。 - 您已经按照这些说明安装了Nginx。
- 您已经为您的域安装了SSL证书。您可以按照这些说明。
安装免费的Let's Encrypt SSL证书。
开始之前
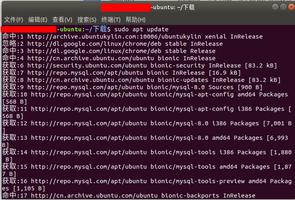
将软件包索引和系统软件包更新为最新版本:
sudo apt update && sudo apt upgrade1.创建一个MySQL数据库
如果您的服务器上安装了 MySQL 或 MariaDB ,则可以跳过此步骤;如果没有,则可以通过键入以下内容从Ubuntu的默认存储库中安装MySQL 5.7服务器软件包:
sudo apt install mysql-server对于全新安装的MySQL,建议运行mysql_secure_installation命令以提高MySQL服务器的安全性。
现在,我们需要登录MySQL Shell并创建一个新的数据库和用户帐户,并为用户提供适当的授予权限。
要登录到MySQL Shell,请键入以下命令,并在出现提示时输入密码:
mysql -u root -p要创建名为drupal,用户名为drupaluser的数据库,并要授予用户必要的权限,请运行以下命令:
CREATE DATABASE drupal CHARACTER SET utf8mb4 COLLATE utf8mb4_general_ci;GRANT SELECT, INSERT, UPDATE, DELETE, CREATE, DROP, INDEX, ALTER, CREATE TEMPORARY TABLES ON drupal.* TO 'drupaluser'@'localhost' IDENTIFIED BY 'change-with-span-password';
2.安装PHP
PHP 7.2 是Ubuntu 18.04中的默认PHP版本,完全受支持,建议在Drupal 8.6中使用。由于我们将Nginx用作网络服务器,因此我们还将安装PHP-FPM。
要安装所有必需的PHP模块,请运行以下命令:
sudo apt install php7.2-cli php7.2-fpm php7.2-mysql php7.2-json php7.2-opcache php7.2-mbstring php7.2-xml php7.2-gd php7.2-curlPHP-FPM服务将在安装过程完成后自动启动,您可以通过打印服务状态来验证它:
systemctl status php7.2-fpm输出应指示fpm服务处于活动状态并且正在运行。
● php7.2-fpm.service - The PHP 7.2 FastCGI Process Manager Loaded: loaded (/lib/systemd/system/php7.2-fpm.service; enabled; vendor preset: enabled)
Active: active (running) since Sat 2018-05-19 19:54:13 UTC; 9h ago
Docs: man:php-fpm7.2(8)
Main PID: 17781 (php-fpm7.2)
Status: "Processes active: 0, idle: 2, Requests: 0, slow: 0, Traffic: 0req/sec"
Tasks: 3 (limit: 507)
CGroup: /system.slice/php7.2-fpm.service
├─17781 php-fpm: master process (/etc/php/7.2/fpm/php-fpm.conf)
├─17796 php-fpm: pool www
└─17797 php-fpm: pool www
3.安装Composer
Composer是PHP的依赖性管理器,我们将使用它来下载Drupal模板并安装所有必需的Drupal组件。
要在安装composer 中全局下载 curl ,然后将文件移动到/usr/local/bin目录:
curl -sS https://getcomposer.org/installer | sudo php -- --install-dir=/usr/local/bin --filename=composer通过打印作曲者版本来验证安装:
composer --version输出应如下所示:
Composer version 1.6.5 2018-05-04 11:44:594.安装Drupal
现在我们已经安装了作曲家,我们可以继续使用/var/www/my_drupal目录中的作曲家 template 创建一个新的Drupal项目:
sudo composer create-project drupal-composer/drupal-project:8.x-dev /var/www/my_drupal --stability dev --no-interaction上面的命令将下载模板,获取所有必需的php软件包并运行一些脚本以准备我们的项目以进行安装。该过程可能需要几分钟,如果成功,则输出结束应类似于以下内容:
Create a sites/default/settings.php file with chmod 0666Create a sites/default/files directory with chmod 0777
下一步是使用Drush安装Drupal。在下面的命令中,我们传递在步骤1中创建的MySQL数据库和用户信息:
cd /var/www/my_drupalsudo vendor/bin/drush site-install --db-url=mysql://drupaluser:[email protected]/drupal
安装程序将提示您以下消息,只需按Enter即可继续。
You are about to DROP all tables in your 'drupal' database. Do you want to continue? (yes/no) [yes]:安装完成后,脚本将打印管理用户名和密码。输出应类似于以下内容:
[notice] Starting Drupal installation. This takes a while. Consider using the --notify global option.[success] Installation complete. User name: admin User password: XRkC9Q5WN9
最后,我们需要设置正确的权限,以便网络服务器可以完全访问该网站的文件和目录。 Nginx和PHP都以www-data用户和www-data组身份运行,因此我们需要发出以下命令:
sudo chown -R www-data: /var/www/my_drupal5.配置Nginx
到现在为止,如果不检查本教程的先决条件,则应该已经在系统上安装了带有SSL证书的Nginx。
要为我们的新Drupal项目创建新的服务器块,我们将使用Nginx官方网站上的Nginx 配方。
打开您的文本编辑器并创建以下文件:
sudo nano /etc/nginx/sites-available/example.com/etc/nginx/sites-available/example.com
# Redirect HTTP -> HTTPSserver {
listen 80;
server_name www.example.com example.com;
include snippets/letsencrypt.conf;
return 301 https://example.com$request_uri;
}
# Redirect WWW -> NON WWW
server {
listen 443 ssl http2;
server_name www.example.com;
ssl_certificate /etc/letsencrypt/live/example.com/fullchain.pem;
ssl_certificate_key /etc/letsencrypt/live/example.com/privkey.pem;
ssl_trusted_certificate /etc/letsencrypt/live/example.com/chain.pem;
include snippets/ssl.conf;
return 301 https://example.com$request_uri;
}
server {
listen 443 ssl http2;
server_name example.com;
root /var/www/my_drupal/web;
# SSL parameters
ssl_certificate /etc/letsencrypt/live/example.com/fullchain.pem;
ssl_certificate_key /etc/letsencrypt/live/example.com/privkey.pem;
ssl_trusted_certificate /etc/letsencrypt/live/example.com/chain.pem;
include snippets/ssl.conf;
# log files
access_log /var/log/nginx/example.com.access.log;
error_log /var/log/nginx/example.com.error.log;
location = /favicon.ico {
log_not_found off;
access_log off;
}
location = /robots.txt {
allow all;
log_not_found off;
access_log off;
}
location ~ \..*/.*\.php$ {
return 403;
}
location ~ ^/sites/.*/private/ {
return 403;
}
# Block access to scripts in site files directory
location ~ ^/sites/[^/]+/files/.*\.php$ {
deny all;
}
# Block access to "hidden" files and directories whose names begin with a
# period. This includes directories used by version control systems such
# as Subversion or Git to store control files.
location ~ (^|/)\. {
return 403;
}
location / {
try_files $uri /index.php?$query_string;
}
location @rewrite {
rewrite ^/(.*)$ /index.php?q=$1;
}
# Don't allow direct access to PHP files in the vendor directory.
location ~ /vendor/.*\.php$ {
deny all;
return 404;
}
location ~ '\.php$|^/update.php' {
fastcgi_split_path_info ^(.+?\.php)(|/.*)$;
include fastcgi_params;
# Block httpoxy attacks. See https://httpoxy.org/.
fastcgi_param HTTP_PROXY "";
fastcgi_param SCRIPT_FILENAME $document_root$fastcgi_script_name;
fastcgi_param PATH_INFO $fastcgi_path_info;
fastcgi_param QUERY_STRING $query_string;
fastcgi_intercept_errors on;
fastcgi_pass unix:/run/php/php7.2-fpm.sock;
}
# Fighting with Styles? This little gem is amazing.
# location ~ ^/sites/.*/files/imagecache/ { # For Drupal <= 6
location ~ ^/sites/.*/files/styles/ { # For Drupal >= 7
try_files $uri @rewrite;
}
# Handle private files through Drupal. Private file's path can come
# with a language prefix.
location ~ ^(/[a-z\-]+)?/system/files/ { # For Drupal >= 7
try_files $uri /index.php?$query_string;
}
location ~* \.(js|css|png|jpg|jpeg|gif|ico|svg)$ {
try_files $uri @rewrite;
expires max;
log_not_found off;
}
}
请不要忘记将example.com替换为您的Drupal域,并为SSL证书文件设置正确的路径。所有 HTTP请求都将重定向到HTTPS 。 本指南中创建了此配置中使用的代码段。
通过创建指向sites-enabled目录的符号链接来启用服务器块:
sudo ln -s /etc/nginx/sites-available/example.com /etc/nginx/sites-enabled/在重新启动Nginx服务之前,请进行测试以确保没有语法错误:
sudo nginx -t如果没有错误,则输出应如下所示:
nginx: the configuration file /etc/nginx/nginx.conf syntax is oknginx: configuration file /etc/nginx/nginx.conf test is successful
最后,通过键入以下内容,重新启动Nginx服务:
sudo systemctl restart nginx6.测试安装
打开浏览器,键入您的域,并假设安装成功,将出现类似于以下的屏幕:
您可以以管理员身份登录并开始自定义新的Drupal安装。
7.安装Drupal模块和主题
现在,您已经安装了Drupal项目,则需要安装一些模块和主题。 Drupal模块和主题托管在自定义的作曲者存储库中,drupal-project可直接为我们进行配置。
要安装模块或主题,您需要做的只是cd到项目目录并键入composer require drupal/module_or_theme_name。例如,如果要安装 Pathauto 模块,则需要运行以下命令:
cd /var/www/my_drupalsudo -u www-data composer require drupal/pathauto
以 sudo -u www-data 为前缀,我们以用户www-data 的身份运行命令
Using version ^1.3 for drupal/pathauto./composer.json has been updated
> DrupalProject\composer\ScriptHandler::checkComposerVersion
Loading composer repositories with package information
Updating dependencies (including require-dev)
Package operations: 3 installs, 0 updates, 0 removals
- Installing drupal/token (1.5.0): Downloading (100%)
- Installing drupal/ctools (3.2.0): Downloading (100%)
- Installing drupal/pathauto (1.3.0): Downloading (100%)
Package phpunit/phpunit-mock-objects is abandoned, you should avoid using it. No replacement was suggested.
Writing lock file
Generating autoload files
> DrupalProject\composer\ScriptHandler::createRequiredFiles
如您从composer的输出中看到的,还为我们安装了所有程序包依赖项。
8。更新Drupal核心
升级前,最好备份文件和数据库。您可以使用 Backup and Migrate 模块,也可以手动备份数据库和文件。
要备份安装文件,可以使用以下 rsync命令,当然,您需要使用正确的安装目录路径:
sudo rsync -a /var/www/my_drupal/ /var/www/my_drupal_$(date +%F)要备份数据库,我们可以使用标准的 mysqldump命令:
mysqldump -u root -p > /var/www/my_drupal_database_$(date +%F).sql或drush sql-dump:
cd /var/www/my_drupalvendor/bin/drush sql-dump > /var/www/my_drupal_database_$(date +%F).sql
现在,我们创建了备份,我们可以通过运行以下命令继续并更新所有Drupal核心文件:
sudo -u www-data composer update drupal/core webflo/drupal-core-require-dev symfony/* --with-dependencies结论
恭喜,您已经使用Composer成功安装了Drupal 8,并了解了如何安装模块和主题。现在,您可以开始自定义您的网站了。 Drupal 8用户指南是学习更多有关如何管理Drupal安装的好起点。您还应该访问Github上的 Drupal Composer 模板项目。
如有疑问,请在下面发表评论。
以上是 如何在Ubuntu 18.04上安装Drupal 的全部内容, 来源链接: utcz.com/z/507103.html