centos7.5安装java JDK、tomcat、mysql
参考资料:
https://www.cnblogs.com/sxdcgaq8080/p/7492426.html
https://blog.csdn.net/ds986619036/article/details/80885917
https://blog.csdn.net/ds986619036/article/details/80885917
https://blog.csdn.net/Rain_xiaolong/article/details/80569972
腾讯云服务器配置环境前请先设置安全组
jdk安装
1.先检查原服务器上是否已经安装了java jdk,如果已安装可以先卸载
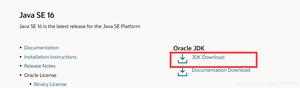
2.下载jdk:jdk-8u212-linux-x64.tar.gz
3.将jdk复制到/usr/local/src/下(可以使用xftp传输)
4.解压:先定位到当前目录
执行解压命令:tar -zxvf jdk-8u212-linux-x64.tar.gz
5.配置环境变量
5.1执行:vim /etc/profile 打开文件
5.2移动光标到末尾
5.3在末尾追加:
#java environment
export JAVA_HOME=/usr/local/src/jdk1.8.0_212
export CLASSPATH=.:${JAVA_HOME}/jre/lib/rt.jar:${JAVA_HOME}/lib/dt.jar:${JAVA_HOME}/lib/tools.jar
export PATH=$PATH:${JAVA_HOME}/bin
执行:esc
执行::wq!
5.4刷新配置文件,验证JDK是否配置成功:
先定为到 /etc目录,然后执行
source /etc/profile
java -version
tomcat安装
1.下载:https://tomcat.apache.org/download-90.cgi
2.将jtomcat复制到/usr/local/src/下(可以使用xftp传输)
3.解压:tar -axvf apache-tomcat-9.0.29.tar.gz
4.配置环境变量
vim /etc/profile
做如下配置:
export JAVA_HOME=/usr/local/src/jdk1.8.0_212
export TOMCAT_HOME=/usr/local/src/apache-tomcat-9.0.29
export CATALINA_HOME=/usr/local/src/apache-tomcat-9.0.29
export CLASSPATH=.:${JAVA_HOME}/jre/lib/rt.jar:${JAVA_HOME}/lib/dt.jar:${JAVA_HOME}/lib/tools.jar
export PATH=$PATH:${JAVA_HOME}/bin:${TOMCAT_HOME}/bin
刷新配置:
5.修改端口及域名指向
将/usr/local/src/apache-tomcat-9.0.29/conf下的server.xml下载到自己电脑上
端口号修改为80
<Connector port="80" protocol="HTTP/1.1"connectionTimeout="20000"
redirectPort="8443" />
绑定网站
<Host name="java.xxx.com" appBase="webapps"unpackWARs="true" autoDeploy="true">
<!-- SingleSignOn valve, share authentication between web applications
Documentation at: /docs/config/valve.html -->
<!--
<Valve className="org.apache.catalina.authenticator.SingleSignOn" />
-->
<!-- Access log processes all example.
Documentation at: /docs/config/valve.html
Note: The pattern used is equivalent to using pattern="common" -->
<Valve className="org.apache.catalina.valves.AccessLogValve" directory="logs"
prefix="localhost_access_log" suffix=".txt"
pattern="%h %l %u %t "%r" %s %b" />
<Context path="/" docBase="web_ssm.war" debug="0" previledge="true" reloadable="true"/>
</Host>
如需要绑定多个域名,可以增加多个Host节点
注意:server.xml绑定的网站在webapps中一定要存在,不然 启动tomcat时会报错
********如上配置运行网站时报错如下:************************
Tomcat Manager App--403 Access Denied You are not authorized to view this page
解决方案是:
修改webapps/manager/META-INF//META-INF/context.xml
将value标签注释掉
**************再次运行网站报错如下:*******************
The page you tried to access (/manager/index) does not exist.
The Manager application has been re-structured for Tomcat 7 onwards and some of URLs have changed. All URLs used to access the Manager application should now start with one of the following options:
- /manager/html for the HTML GUI
- /manager/text for the text interface
- /manager/jmxproxy for the JMX proxy
- /manager/status for the status pages
Note that the URL for the text interface has changed from "/manager" to "/manager/text".
You probably need to adjust the URL you are using to access the Manager application. However, there is always a chance you have found a bug in the Manager application. If you are sure you have found a bug, and that the bug has not already been reported, please report it to the Apache Tomcat team.
URL 不能以/manager开头,将所有以/manager开头的url改掉就解决了
6.把war包放到tomcat安装目录下的webapps目录
删除webapps目录下的examples和docs目录
7.开启80端口
sudo firewall-cmd --zone=public --add-port=80/tcp --permanent
7.1重启防火墙
sudo systemctl restart firewalld.service
8.启动和关闭tomcat
启动:/usr/local/src/apache-tomcat-9.0.29/bin/startup.sh
关闭:/usr/local/src/apache-tomcat-9.0.29/bin/shutdown.sh
查看tomcat启动日志判断是否 启动成功:
首先定位到/usr/local/src/apache-tomcat-9.0.29/logs目录,然后执行:
tail -f catalina.out
9.设置开机自动启动
9.1在目录/usr/local/src/apache-tomcat-9.0.29/bin创建setenv.sh文件
#catalina.sh在执行的时候会调用同级路径下的setenv.sh来设置额外的环境变量
文件内容:
export CATALINA_HOME=/usr/local/src/apache-tomcat-9.0.29export CATALINA_BASE=/usr/local/src/apache-tomcat-9.0.29
#设置Tomcat的PID文件
CATALINA_PID="$CATALINA_BASE/tomcat.pid"
#添加JVM选项
JAVA_OPTS="-server -XX:PermSize=256M -XX:MaxPermSize=1024m -Xms512M -Xmx1024M -XX:MaxNewSize=256m"
9.2编写tomcat.service文件,在/usr/lib/systemd/system路径下添加tomcat.service文件,内容如下:
[Unit]Description=Tomcat9.0.29
After=syslog.target network.target remote-fs.target nss-lookup.target
[Service]
Type=forking
PIDFile=/usr/local/src/apache-tomcat-9.0.29/tomcat.pid
ExecStart=/usr/local/src/apache-tomcat-9.0.29/bin/startup.sh
ExecReload=/bin/kill -s HUP $MAINPID
ExecStop=/bin/kill -s QUIT $MAINPID
PrivateTmp=true
[Install]
WantedBy=multi-user.target
9.3设置开机启动tomcat.service
systemctl enable tomcat.service
9.4启动tomcat
systemctl start tomcat.service
**********报错如下:***************************************************
Job for tomcat.service failed because the control process exited with error code. See "systemctl status tomcat.service" and "journalctl -xe" for details.
执行:systemctl status tomcat.servic 查看详细报错详细如下:
● tomcat.service - Tomcat9.0.29
Loaded: loaded (/usr/lib/systemd/system/tomcat.service; enabled; vendor preset: disabled)
Active: failed (Result: exit-code) since Thu 2019-12-05 17:43:06 CST; 21s ago
Process: 6097 ExecStart=/usr/local/src/apache-tomcat-9.0.29/bin/startup.sh (code=exited, status=1/FAILURE)
Dec 05 17:43:06 VM_0_2_centos systemd[1]: Starting Tomcat9.0.29...
Dec 05 17:43:06 VM_0_2_centos startup.sh[6097]: Neither the JAVA_HOME nor the JRE_HOME environment variable is defined
Dec 05 17:43:06 VM_0_2_centos startup.sh[6097]: At least one of these environment variable is needed to run this program
Dec 05 17:43:06 VM_0_2_centos systemd[1]: tomcat.service: control process exited, code=exited status=1
Dec 05 17:43:06 VM_0_2_centos systemd[1]: Failed to start Tomcat9.0.29.
Dec 05 17:43:06 VM_0_2_centos systemd[1]: Unit tomcat.service entered failed state.
Dec 05 17:43:06 VM_0_2_centos systemd[1]: tomcat.service failed.
解决错误:
修改/usr/local/src/apache-tomcat-9.0.29/bin下的catalina.sh 文件,在文件顶部加入如下代码:
export JAVA_HOME=/usr/local/src/jdk1.8.0_212export JRE_HOME=/usr/local/src/jdk1.8.0_212/jre
重新启动tomcat:systemctl start tomcat.service
重新查看tomcat服务状态:systemctl status tomcat
9.5.常用命令
开机启动
systemctl enable tomcat.service
移除开机启动
systemctl disable tomcat.service
开机禁止启动
systemctl disable tomcat.service
启动tomcat
systemctl start tomcat.service
关闭tomcat
systemctl stop tomcat.service
重启
systemctl restart tomcat.service
mysql安装
1.下载安装包
wget http://dev.mysql.com/get/mysql57-community-release-el7-8.noarch.rpm
下载到/usr/local/src目录下面
2.安装mysql源
3.检查mysql源是否安装成功
yum repolist enabled | grep "mysql.*-community.*"
4.安装MySQL服务端
yum install mysql-community-server
5.启动MySQL服务
等同于命令:systemctl start mysqldservice mysqld start
重启命令是:service mysqld restart
6.检查mysql 的运行状态
service mysqld status
7.修改root本地登录密码
7.1查看初始密码
grep 'temporary password' /var/log/mysqld.log7.2用初始密码登录
mysql -uroot -p
7.3修改初始密码
set password for 'root'@'localhost'=password('密码');
注意:mysql5.7默认安装了密码安全检查插件(validate_password),默认密码检查策略要求密码必须包含:大小写字母、数字和特殊符号,并且长度不能少于8位。否则会提示ERROR 1819 (HY000): Your password does not satisfy the current policy requirements错误
8.授权其他机器登陆
GRANT ALL PRIVILEGES ON *.* TO 'root'@'%' IDENTIFIED BY '设置的密码' WITH GRANT OPTION;FLUSH PRIVILEGES;
9.退出mysql
10.防火墙开启3306端口
10.1执行:sudo firewall-cmd --zone=public --add-port=3306/tcp --permanent
********报错如下:防火墙未开启*******
10.2开启防火墙
通过systemctl status firewalld查看firewalld状态,发现当前是dead状态,即防火墙未开启。
通过systemctl start firewalld开启防火墙,没有任何提示即开启成功。
再次通过systemctl status firewalld查看firewalld状态,显示running即已开启了。
如果要关闭防火墙设置,可能通过systemctl stop firewalld这条指令来关闭该功能。
10.3防火墙开启3306端口
sudo firewall-cmd --zone=public --add-port=3306/tcp --permanent
10.4重启防火墙
sudo systemctl restart firewalld.service
10.5查看所有开启的端口命令:firewall-cmd --list-ports
11.测试连接:
12.设置mysql开机启动
systemctl enable mysqldsystemctl daemon-reload
13.mysql命令
停止
service mysqld stop
开启
service mysqld start
重启
service mysqld restart
14.mysql部署到服务器时经常报错如下:
### Error querying database. Cause: com.mysql.jdbc.exceptions.jdbc4.CommunicationsException: The last packet successfully received from the server was 141,839,270 milliseconds ago. The last packet sent successfully to the server was 141,839,271 milliseconds ago. is longer than the server configured value of 'wait_timeout'. You should consider either expiring and/or testing connection validity before use in your application, increasing the server configured values for client timeouts, or using the Connector/J connection property 'autoReconnect=true' to avoid this problem.
### The error may exist in file [/usr/local/src/apache-tomcat-9.0.29/webapps/ROOT/WEB-INF/classes/com/eggtwo/euq/entity/MemberMapper.xml]
### The error may involve com.eggtwo.euq.dao.MemberMapper.selectByLoginName-Inline
### The error occurred while setting parameters
### SQL: select id, loginName, saltKey, loginPassword, relName, email, phone, admin, deleted, createdTime from mms_member where loginName = ?
### Cause: com.mysql.jdbc.exceptions.jdbc4.CommunicationsException: The last packet successfully received from the server was 141,839,270 milliseconds ago. The last packet sent successfully to the server was 141,839,271 milliseconds ago. is longer than the server configured value of 'wait_timeout'. You should consider either expiring and/or testing connection validity before use in your application, increasing the server configured values for client timeouts, or using the Connector/J connection property 'autoReconnect=true' to avoid this problem.
; SQL []; The last packet successfully received from the server was 141,839,270 milliseconds ago. The last packet sent successfully to the server was 141,839,271 milliseconds ago. is longer than the server configured value of 'wait_timeout'. You should consider either expiring and/or testing connection validity before use in your application, increasing the server configured values for client timeouts, or using the Connector/J connection property 'autoReconnect=true' to avoid this problem.; nested exception is com.mysql.jdbc.exceptions.jdbc4.CommunicationsException: The last packet successfully received from the server was 141,839,270 milliseconds ago. The last packet sent successfully to the server was 141,839,271 milliseconds ago. is longer than the server configured value of 'wait_timeout'. You should consider either expiring and/or testing connection validity before use in your application, increasing the server configured values for client timeouts, or using the Connector/J connection property 'autoReconnect=true' to avoid this problem.
解决方案如下:
参考:https://blog.csdn.net/qiushisoftware/article/details/77718634
https://developer.aliyun.com/ask/78524?spm=a2c6h.13159736
https://msd.misuland.com/pd/3255818066314920538
第一步:查找my.cnf文件,查找的结果是在/etc目录下
修改my.cnf文件:
修改MySQL的参数,wait_timeout最大为31536000即1年,在my.cnf中加入:
wait_timeout=31536000interactive_timeout=31536000
重启mysql服务
service mysqld restart
以上是 centos7.5安装java JDK、tomcat、mysql 的全部内容, 来源链接: utcz.com/z/390647.html