React Native—集成到原生Android项目

目前的react-native版本是
0.57.8,參考了一些文章之後,終於集成好了。React Native環境的搭建我就不説了,詳細的可以參考React Native中文網的搭建文檔。
創建新的Android工程
環境配置好之後(sdk下載可能比較慢),用Android Studio創建一個Empty Activity的項目。
集成React Native
安裝相關依賴
在項目根目錄下執行
npm init命令,生成 package.json 文件。此時要注意一下package name和入口文件entry point(新版都寫index.js)。然後package.json 文件中scripts標簽下添加start配置,即可通過npm start啓動。"start": "node node_modules/react-native/local-cli/cli.js start"然後執行命令
npm install --save react react-native,如果出现RN需要哪个版本react支持就install @xx.xx版本的。"dependencies": {"react": "^16.6.3",
"react-native": "^0.57.8"
}
這是我目前的版本。
在項目的根目錄下創建.flowconfig文件,该文件的内容可以从Facebook 的GitHub上下载, 查看这里, 将其内容copy进去即可
也可直接運行命令創建.flowconfig文件
curl -o .flowconfig https://raw.githubusercontent.com/facebook/react-native/master/.flowconfig //下载.flowconfig文件Flow allows us to easily add static type checking to our JavaScript. Flow will help you prevent bugs and allow for better code documentation among other things. A lot of the React Native documentation and source code already also uses flow, so there has never been a better time to start using it!
配置maven
在app/ 目录下的 build.gradle 文件中的 dependencies 里添加 React Native 依赖:
dependencies {implementation \'com.android.support:appcompat-v7:27.1.1\'
...
implementation "com.facebook.react:react-native:+" // From node_modules
}
如果想要指定特定的 React Native 版本,可以用具体的版本号替换
+,当然前提是你从 npm 里下载的是这个版本。在项目的 build.gradle 文件中为 React Native 添加一个 maven 依赖的入口,必须写在 "allprojects" 代码块中:
allprojects {repositories {
maven {
// All of React Native (JS, Android binaries) is installed from npm
url "$rootDir/../node_modules/react-native/android"
// 若node_modules在根目录下,直接写成url "$rootDir/node_modules/react-native/android"
}
...
}
...
}
添加NDK支持
如果不添加这句话的话,可能会造成关于32位和64位SO库混合引入Crash:
- 在App 的build.gradle中的defaultConfig节点下添加如下语句:
ndk {abiFilters "armeabi-v7a", "x86"
}
即:
defaultConfig {
applicationId "com.example.lance.myapplication"
minSdkVersion 23
targetSdkVersion 26
versionCode 1
versionName "1.0"
testInstrumentationRunner "android.support.test.runner.AndroidJUnitRunner"
ndk {
abiFilters "armeabi-v7a", "x86"
}
}
然后在我们project下的gradle.properties文件中的末尾添加如下语句:
android.useDeprecatedNdk=true
在App的build.gradle文件的android节点下添加:
configurations.all {resolutionStrategy.force \'com.google.code.findbugs:jsr305:1.3.9\'
}
代码集成
创建一个index.js文件
创建我们的 react-native 组件,在根目录下创建 index.js,(在 react-native 0.49.0版本以前,是 index.android.js 和 index.ios.js 作为入口文件,现在合成一个 index.js 文件了)
import React from \'react\';import {AppRegistry, StyleSheet, Text, View} from \'react-native\';
class App extends React.Component {
render() {
return (
<View style={styles.container}>
<Text style={styles.hello}>Hello, React Native!</Text>
</View>
);
}
}
var styles = StyleSheet.create({
container: {
flex: 1,
justifyContent: \'center\',
},
hello: {
fontSize: 20,
textAlign: \'center\',
margin: 10,
color: \'red\',
},
});
AppRegistry.registerComponent(\'MyReactNativeApp\', () => App);
完成以上步骤后,React Native就算集成到我们现有的Android项目中,接下来我们用Activity来展示我们的ReactNative.
創建一個Activity
新版本中的ReactNative只需要自定义一个Activity,并将其集成ReactActivity,实现getMainComponentName()方法,在该方法中返回一开始我们注册的ReactNative的名称即可(即跟我们的index.android.js中的AppRegistry中的第一个参数相同),在ReactActivity中,已经帮我们实现了ReactRoot与ReactInstanceManager的配置,在之前的版本中,ReactRoot与ReactInstanceManager需要我们自己去写.
创建 MyReactActivity, 在上面创建安卓项目的时候,已经创建了一个 MainActivity,在它的同级目录下,在 Android Studio右键新建一个 Activity,命名为 MyReactActivity,然后把内容改为如下:
package com.xl.hellorn;import javax.annotation.Nullable;
import com.facebook.react.ReactActivity;
public class MyReactActivity extends ReactActivity {
@Nullable
@Override
protected String getMainComponentName() {
return "MyReactNativeApp"; //MyReactNativeApp即注册ReactNative时的名称;
}
}
创建 MyApplication
初始化一个ReactNativeHost,该MyApplication继承Application并实现ReactApplication,在源码loadApp方法时,会将当前的Activity的Application强制转换成ReactApplication:
package com.xl.hellorn;import android.app.Application;
import com.facebook.react.ReactApplication;
import com.facebook.react.ReactNativeHost;
import com.facebook.react.ReactPackage;
import com.facebook.react.shell.MainReactPackage;
import com.facebook.soloader.SoLoader;
import java.util.Arrays;
import java.util.List;
public class MyApplication extends Application implements ReactApplication {
private final ReactNativeHost reactNativeHost = new ReactNativeHost(this) {
@Override
public boolean getUseDeveloperSupport() {
return BuildConfig.DEBUG;
}
@Override
protected List<ReactPackage> getPackages() {
return Arrays.<ReactPackage>asList(new MainReactPackage());
}
// 这是需要添加的
@Override
protected String getJSMainModuleName() {
return "index";
}
};
@Override
public ReactNativeHost getReactNativeHost() {
return reactNativeHost;
}
@Override
public void onCreate() {
super.onCreate();
SoLoader.init(this,false);
}
}
最后在 app/src/main/AndroidManifest.xml 文件中,添加一些权限,以及声明MyApplication 跟 MyReactActivity
<?xml version="1.0" encoding="utf-8"?><manifest xmlns:android="http://schemas.android.com/apk/res/android"
package="com.xl.hellorn">
<uses-permission android:name="android.permission.INTERNET"/> <!-- 网络权限 -->
<uses-permission android:name="android.permission.SYSTEM_ALERT_WINDOW"/> <!-- 弹框权限 -->
<uses-permission android:name="android.permission.SYSTEM_OVERLAY_WINDOW"/> <!-- 窗体覆盖权限 -->
<!-- 声明MainApplication -->
<application
android:name=".MyApplication"
android:allowBackup="true"
android:icon="@mipmap/ic_launcher"
android:label="@string/app_name"
android:roundIcon="@mipmap/ic_launcher_round"
android:supportsRtl="true"
android:theme="@style/AppTheme">
<activity android:name=".MainActivity">
<intent-filter>
<action android:name="android.intent.action.MAIN" />
<category android:name="android.intent.category.LAUNCHER" />
</intent-filter>
</activity>
<!-- 声明MyReactActivity -->
<activity
android:name=".MyReactActivity"
android:label="@string/app_name"
android:theme="@style/Theme.AppCompat.Light.NoActionBar">
</activity>
<!-- 声明可以通过晃动手机或者点击Menu菜单打开相关的调试页面 -->
<activity android:name="com.facebook.react.devsupport.DevSettingsActivity"/>
</application>
</manifest>
原生页面跳转到react-native页面
在原生中加一个按钮,在 MainActivity 添加一个按钮跳转到 MyReactActivity,首先在 app/src/main/res/layout 下的 activity_main.xml 添加一个按钮元素
<Button android:id="@+id/btn"
android:layout_width="wrap_content"
android:layout_height="wrap_content"
android:text="点击跳转到RN界面"/>
在 MainActivity 里添加点击跳转事件
package com.xl.hellorn;import android.content.Intent;
import android.support.v7.app.AppCompatActivity;
import android.os.Bundle;
import android.view.View;
public class MainActivity extends AppCompatActivity {
@Override
protected void onCreate(Bundle savedInstanceState) {
super.onCreate(savedInstanceState);
setContentView(R.layout.activity_main);
// 点击按钮跳转到 react-native 页面
findViewById(R.id.btn).setOnClickListener(new View.OnClickListener() {
@Override
public void onClick(View view) {
startActivity(new Intent(MainActivity.this,MyReactActivity.class));
}
});
}
}
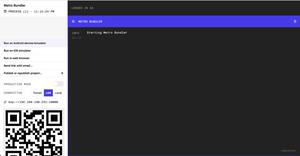
完成以上步骤后,切换到我们的Terminal窗口,执行npm start命令来启动我们的React Native Server, 如果在这出现错误, 则可以认为我们的项目中没有index.android.bundle这个文件 , 接下来, 我们手动的在app/src/main/目录中添加一个assets目录, 并在该目录下添加一个index.android.bundle文件, 然后手动在该bundle文件中添加内容, 执行以下命令:
react-native bundle --platform android --dev false --entry-file index.js --bundle-output app/src/main/assets/index.android.bundle --assets-dest app/src/main/res/
声明:
- --platform : 平台(android/ios)
- --dev : 开发模式
- --entry-file : 条目文件
- --bundle-output : bundle文件生成的目录
- --assets-dest : 资源文件生成的目录
再次执行 npm start 启动本地服务器,点击按钮,出现了红屏,也就是错误页面。
从错误信息 error: bundling failed: NotFoundError: Cannot find entry file index.android.js in any of the roots 我们可以看出找不到入口文件index.android.js,而我们的入口文件是 index.js,因此我们需要另外加一些配置让它知道我们的入口文件其实是 index.js
解决方法参考 react-native/issues/16517。在 app/ 目录下的 build.gradle 文件中最上面添加
apply plugin: \'com.android.application\' // 这时原来存在的apply from: "../node_modules/react-native/react.gradle"
project.ext.react = [
entryFile: "index.js"
]
然后在 MainApplication 的 ReactNativeHost 类中添加:
private final ReactNativeHost mReactNativeHost = new ReactNativeHost(this) { ...
// 这是需要添加的
@Override
protected String getJSMainModuleName() {
return "index";
}
}
再次运行,就可以正常跳转到 react-native 的页面了。
参考链接:
http://www.apkbus.com/blog-847095-77211.html
https://github.com/lin-xin/blog/issues/26
以上是 React Native—集成到原生Android项目 的全部内容, 来源链接: utcz.com/z/383845.html

