react-native-img-cache使用的例子-轮播图与单纯图片

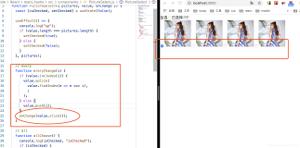
在本地下载好,并且改完了文件,正常运行的情况下,使用react-native-img-cache组件写了个小的demo,成品如图:
想要使用react-native-swiper组件,**记得先下载 **:
官网地址:https://github.com/leecade/react-native-swiper
使用react-native-swiper组件的基本命令安装:npm i react-native-swiper --save
查看:npm view react-native-swiper
删除:npm rm react-native-swiper --save
在使用前,记得要先引入:
import Swiper from 'react-native-swiper';下面就可以看这个img-cache了:
CachedImage
用于显示图片:
import {CachedImage} from "react-native-img-cache";<CachedImage source={{ uri: "https://i.ytimg.com/vi/yaqe1qesQ8c/maxresdefault.jpg" }} mutable/>
该mutable属性暗示假设图像URI可以随时间改变。此缓存的生命周期是正在运行的应用程序之一,可以使用它手动终止ImageCache
ImageCache
clear():删除缓存条目和所有物理文件。
ImageCache.get().clear();bust(uri):ImageCache可用于从本地缓存中清除图像。这将删除缓存条目,但不会删除任何物理文件。
ImageCache.get().bust("http://h.hiphotos.baidu.com/zhidao/wh%3D600%2C800/sign=d8d47aee8435e5dd9079add946f68bd7/f31fbe096b63f624fc76a3bf8644ebf81a4ca367.jpg");cancel(uri):它还可用于取消图像下载。滚动图像时,这非常有用。
ImageCache.get().cancel("https://pic.xiami.net/images/common/uploadpic/0/1543997341000.jpg?x-oss-process=image/quality,q_80/crop,y_30,h_360")on(uri,observer,immutable):该ImageCache班可观察员缓存中注册。
const immutable = true;const observer = (path: string) => {
console.log(`path of the image in the cache: ${path}`);
};
ImageCache.get().on(uri, observer, immutable);
dispose(uri, observer):观察员可以使用dispose以下方式注销:
ImageCache.get().dispose(uri, observer);demo中的获取数据和清空,都是可以实现的,
代码如下:
/** * Sample React Native App
* https://github.com/facebook/react-native
* @flow
*/
import React, { Component } from 'react';
import Swiper from 'react-native-swiper';
import {
AppRegistry,
StyleSheet,
Text,
View,
Image,
TouchableOpacity,Platform,
Dimensions,
} from 'react-native';
import {CachedImage, ImageCache,CustomCachedImage,} from "react-native-img-cache";
//CachedImage:用来显示图片 ImageCache:用来管理的,比如获取图片的路径、清理缓存神马的
const carouselMokeData =[
{
"title": "阳光明媚,青春正好",
"previewUrl": "http://imgsrc.baidu.com/image/c0%3Dshijue1%2C0%2C0%2C294%2C40/sign=2bf80c7b0633874488c8273f3966b38c/eaf81a4c510fd9f90af607422f2dd42a2834a43c.jpg"
},
{
"title": "自信,是无尽智慧的凝聚.",
"previewUrl": "http://pic1.16pic.com/00/11/69/16pic_1169706_b.jpg"
},
{
"title": "平淡,是成功路上的驿站.",
"previewUrl": "http://pic9.photophoto.cn/20081229/0034034885643767_b.jpg"
},
]
export default class catchDemo extends Component {
constructor(props) {
super(props);
// this._goBack = this._goBack.bind(this);
}
componentWillMount() {
// console.warn(JSON.stringify(ImageCache.get()))
// ImageCache.get().cancel("https://pic.xiami.net/images/common/uploadpic/0/1543997341000.jpg?x-oss-process=image/quality,q_80/crop,y_30,h_360")
// console.warn('取消下载第一张图')
}
//首页轮播图
renderSwiperView() {
let images = carouselMokeData.map((value, i) => {
return (
<View key={i} style={{backgroundColor:'#ededed',}}>
<CachedImage source={{uri:value.previewUrl}} resizeMode='stretch' style={{height:300,width: Dimensions.get('window').width}}/>
<Text numberOfLines={1} style={{backgroundColor:'rgba(51,51,51,0.7)',position:'relative',bottom:Platform.OS == 'android'?55:51,width: Dimensions.get('window').width,fontFamily:'.PingFangSC-Medium',fontSize: 15, color: '#fff',paddingBottom:10,paddingTop:10,paddingLeft:15}}>{value.title}</Text>
</View>
);
});
return (
<Swiper removeClippedSubviews={false} height={300} horizontal={true} autoplay={true} autoplayTimeout={2} dotColor={'rgba(255,255,255,0.26)'} activeDotColor={'#fff'} paginationStyle={{bottom:38, left: null, right: 10}}>
{images}
</Swiper>
);
}
render() {
return (
<View style={styles.container}>
<View style={{backgroundColor:'pink',height:300}}>
<View style={{height:'100%',width:'100%',}}>
{this.renderSwiperView()}
</View>
</View>
<View style={styles.imageStyle}>
<CachedImage style={styles.imgsStyle}
source={{ uri: "https://pic.xiami.net/images/common/uploadpic/0/1543997341000.jpg?x-oss-process=image/quality,q_80/crop,y_30,h_360" }}
/> {/*其实mutable的属性是代表图片的地址会随着时间的改变发生变化,地址不固定。那么该缓存的生命周期应用的运行时期并且该可以通过ImageCache模块进行手动管理,在这没有我没有在CachedImage添加这个属性*/}
<TouchableOpacity onPress={()=>{console.log(JSON.stringify(ImageCache.get()))}} >
<CachedImage
style={styles.imgsStyle}
source={{ uri: "http://h.hiphotos.baidu.com/zhidao/wh%3D600%2C800/sign=d8d47aee8435e5dd9079add946f68bd7/f31fbe096b63f624fc76a3bf8644ebf81a4ca367.jpg" }}
/>
</TouchableOpacity>
</View>
<View style={{backgroundColor:'pink',flexDirection:'row',justifyContent:'space-between',width:400}}>
<TouchableOpacity onPress={()=>{console.warn(JSON.stringify(ImageCache.get()))}} >
<Text>获取数据</Text>
</TouchableOpacity>
{/*<TouchableOpacity onPress={()=>{ImageCache.get().clear();console.warn(JSON.stringify(ImageCache.get())) }} >*/}
<TouchableOpacity onPress={()=>{ImageCache.get().bust("http://h.hiphotos.baidu.com/zhidao/wh%3D600%2C800/sign=d8d47aee8435e5dd9079add946f68bd7/f31fbe096b63f624fc76a3bf8644ebf81a4ca367.jpg");console.warn(JSON.stringify(ImageCache.get()))}} >
<Text>清空</Text>
</TouchableOpacity>
</View>
</View>
);
}
}
const styles = StyleSheet.create({
container: {
flex: 1,
justifyContent: 'center',
alignItems: 'center',
backgroundColor: '#F5FCFF',
},
welcome: {
fontSize: 20,
textAlign: 'center',
margin: 10,
},
imageStyle: {
// flexDirection:'row',
marginBottom: 5,
},
imgsStyle:{
width:'100%',
height: 200,
backgroundColor:'#ededed',
marginTop:20,
}
});
AppRegistry.registerComponent('catchDemo', () => catchDemo);
以上就是写的小demo了,希望可以帮助需要的人(包括偶自己),继续加油!
以上是 react-native-img-cache使用的例子-轮播图与单纯图片 的全部内容, 来源链接: utcz.com/z/383035.html


