基于最新版本React Native实现JsBundle预加载,界面秒开优化

本文来自Songlcy投稿:文章地址:http://blog.csdn.net/u013718120/article/details/71538263
一、问题分析
本篇博客同样和大家分享关于React Native的内容。想必大家在撸码中都发现了一个问题:从Android原生界面第一次跳转到React Native界面时,会有短暂的白屏过程,然后才会加载出界面。下次再跳转就不会出现类似问题。并且当我们杀死应用,重新启动App从Android Activity跳转到RN界面,依然会出现短暂白屏。
刚创建的React Native交流10群:157867561,欢迎各位大牛,React Native技术爱好者加入交流!同时博客右侧欢迎微信扫描关注订阅号,移动技术干货,精彩文章技术推送!
为什么第一次加载React Native界面会出现短暂白屏呢?大家别忘了,React Native的渲染机制是对于JsBundle的加载。项目中所有的js文件最终会被打包成一个JsBundle文件,Android环境下Bundle文件为:‘index.android.bundle’。系统在第一次渲染界面时,会首先加载JsBundle文件。那么问题肯定出现在加载JsBundle这个过程,即出现白屏可能是因为JsBundle正在加载。发现了原因,我们继续查看源码,看看是否能从源码中得知一二。
二、源码分析
Android集成的RN界面,需要继承ReactActivity,那么直接从ReactActivity源码入手:
?
1 2 3 4 5 6 7 8 9 10 11 12 13 14 15 16 17 18 19 20 21 22 23 24 25 26 27 28 29 30 31 32 33 34 35 36 37 38 39 40 41 42 43 44 45 46 47 48 49 50 |
abstract class ReactActivity extends Activity
DefaultHardwareBackBtnHandler, PermissionAwareActivity {
final ReactActivityDelegate mDelegate;
ReactActivity() {
= createReactActivityDelegate();
Returns the name of the main component registered from JavaScript.
This is used to schedule rendering of the component.
e.g. "MoviesApp"
@Nullable String getMainComponentName() {
null
Called at construction time, override if you have a custom delegate implementation.
ReactActivityDelegate createReactActivityDelegate() {
new ReactActivityDelegate( getMainComponentName());
void onCreate(Bundle savedInstanceState) {
void onPause() {
void onResume() {
void onDestroy() {
其余代码略......
|
不难发现,ReactActivity中的行为都交给了ReactActivityDelegate类来处理。很明显是委托模式。至于白屏原因是因为第一次创建时,那么我们直接看onCreate即可。找到ReactActivityDelegate的onCreate方法:
?
1 2 3 4 5 6 7 8 9 10 11 12 13 14 15 16 17 18 |
void onCreate(Bundle savedInstanceState) {
needsOverlayPermission =
(getReactNativeHost().getUseDeveloperSupport() && Build.VERSION.SDK_INT >= Build.VERSION_CODES.M) {
Get permission to show redbox in dev builds.
(!Settings.canDrawOverlays(getContext())) {
=
serviceIntent = Intent(Settings.ACTION_MANAGE_OVERLAY_PERMISSION, Uri.parse( + getContext().getPackageName()));
REDBOX_PERMISSION_MESSAGE);
REDBOX_PERMISSION_MESSAGE, Toast.LENGTH_LONG).show();
getContext()).startActivityForResult(serviceIntent, REQUEST_OVERLAY_PERMISSION_CODE);
(mMainComponentName != && !needsOverlayPermission) {
= DoubleTapReloadRecognizer();
|
从源码可以看到,最终调用了loadApp方法,继续跟踪loadApp方法:
?
1 2 3 4 5 6 7 8 9 10 11 |
void loadApp(String appKey) {
(mReactRootView != {
new IllegalStateException( loadApp while app is already running."
= createRootView();
|
?
1 2 3 |
ReactRootView createRootView() {
new ReactRootView(getContext());
|
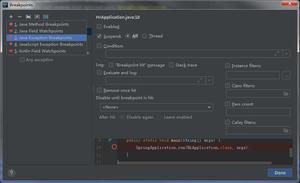
loadApp方法中调用了createRootView创建了ReactRootView,即React Native界面,并且将界面设置到Activity中。那么问题很可能出现在这了。插个断点,调试看看执行时间。
一切恍然大悟,在createRootView和startReactApplication时,消耗了较长时间。
既然是createRootView和startReactApplication执行了耗时操作的问题,那么我们只需要将其提前执行,创建出ReactRootView并缓存下来。当跳转到React Native界面时,直接设置到ContentView即可。有了解决思路,又该到我们甩起袖子撸码了。
三、功能实现
?
1 2 3 4 5 6 7 8 9 10 11 12 13 14 15 16 17 18 19 20 21 22 23 24 25 26 27 28 29 30 31 32 33 34 35 36 37 38 39 40 41 42 43 44 45 46 47 48 49 50 51 52 53 |
预加载工具类
Created by Song on 2017/5/10.
class ReactNativePreLoader {
static final Map<String,ReactRootView> CACHE = ArrayMap<>();
初始化ReactRootView,并添加到缓存
@param activity
@param componentName
static void preLoad(Activity activity, String componentName) {
(CACHE.get(componentName) != {
1.创建ReactRootView
rootView = ReactRootView(activity);
activity.getApplication()).getReactNativeHost().getReactInstanceManager(),
2.添加到缓存
rootView);
获取ReactRootView
@param componentName
@return
static ReactRootView getReactRootView(String componentName) {
CACHE.get(componentName);
从当前界面移除 ReactRootView
@param component
static void deatchView(String component) {
{
rootView = getReactRootView(component);
parent = (ViewGroup) rootView.getParent();
(parent != {
(Throwable e) {
|
上述代码很简单,包含了三个方法:
(1)preLoad
负责创建ReactRootView,并添加到缓存。
(2)getReactRootView
获取创建的RootView
(3)deatchView
将添加的RootView从布局根容器中移除,在 ReactActivity 销毁后,我们需要把 view 从 parent 上卸载下来,避免出现重复添加View的异常。
从源码分析部分我们知道,集成React Native界面时,只需要继承ReactActivity,并实现getMainComponentName方法即可。加载创建视图的流程系统都在ReactActivity帮我们完成。现在因为自定义了ReactRootView的加载方式,要使用预加载方式,就不能直接继承ReactActivity。所以接下来需要我们自定义ReactActivity。
从源码中我们已经发现,ReactActivity的处理都交给了ReactActivityDelegate。所以我们可以自定义一个新的ReactActivityDelegate,只需要修改onCreate创建部分,其他照搬源码即可。
?
1 2 3 4 5 6 7 8 9 10 11 12 13 14 15 16 17 18 19 20 21 22 23 24 25 26 27 28 29 30 31 32 33 34 35 36 37 38 39 40 41 42 43 44 45 46 47 48 49 50 51 52 53 54 55 56 57 58 59 60 61 62 63 64 65 66 67 68 69 70 71 72 73 74 75 76 77 78 79 80 81 82 83 84 85 86 87 88 89 90 91 92 93 94 95 96 97 98 99 100 101 102 103 104 105 106 107 108 109 110 111 112 113 114 115 116 117 118 119 120 121 122 123 124 125 126 127 128 129 130 131 132 133 134 135 136 137 138 139 140 141 142 143 144 145 146 147 148 149 150 151 152 153 154 155 156 157 158 159 160 161 162 163 |
class PreLoadReactDelegate {
final Activity mActivity;
ReactRootView mReactRootView;
Callback mPermissionsCallback;
final String mMainComponentName;
PermissionListener mPermissionListener;
final int REQUEST_OVERLAY_PERMISSION_CODE = 1111;
DoubleTapReloadRecognizer mDoubleTapReloadRecognizer;
PreLoadReactDelegate(Activity activity, @Nullable String mainComponentName) {
= activity;
= mainComponentName;
void onCreate() {
needsOverlayPermission =
(getReactNativeHost().getUseDeveloperSupport() && Build.VERSION.SDK_INT >= Build.VERSION_CODES.M) {
Get permission to show redbox in dev builds.
(!Settings.canDrawOverlays(mActivity)) {
=
serviceIntent = Intent(Settings.ACTION_MANAGE_OVERLAY_PERMISSION, Uri.parse( + mActivity.getPackageName()));
REQUEST_OVERLAY_PERMISSION_CODE);
(mMainComponentName != && !needsOverlayPermission) {
1.从缓存中获取RootView
= ReactNativePreLoader.getReactRootView(mMainComponentName);
== {
2.缓存中不存在RootView,直接创建
= ReactRootView(mActivity);
3.将RootView设置到Activity布局
= DoubleTapReloadRecognizer();
void onResume() {
(getReactNativeHost().hasInstance()) {
(DefaultHardwareBackBtnHandler)mActivity);
(mPermissionsCallback != {
=
void onPause() {
(getReactNativeHost().hasInstance()) {
void onDestroy() {
(mReactRootView != {
=
(getReactNativeHost().hasInstance()) {
清除View
boolean onNewIntent(Intent intent) {
(getReactNativeHost().hasInstance()) {
true
false
void onActivityResult(int requestCode, int resultCode, Intent data) {
(getReactNativeHost().hasInstance()) {
requestCode, resultCode, data);
{
Did we request overlay permissions?
(requestCode == REQUEST_OVERLAY_PERMISSION_CODE && Build.VERSION.SDK_INT >= Build.VERSION_CODES.M) {
(Settings.canDrawOverlays(mActivity)) {
(mMainComponentName != {
(mReactRootView != {
new IllegalStateException( loadApp while app is already running."
= ReactRootView(mActivity);
boolean onBackPressed() {
(getReactNativeHost().hasInstance()) {
true
false
boolean onRNKeyUp(int keyCode) {
(getReactNativeHost().hasInstance() && getReactNativeHost().getUseDeveloperSupport()) {
(keyCode == KeyEvent.KEYCODE_MENU) {
true
didDoubleTapR = Assertions.assertNotNull(mDoubleTapReloadRecognizer)
mActivity.getCurrentFocus());
(didDoubleTapR) {
true
false
void requestPermissions(String[] permissions, int requestCode, PermissionListener listener) {
= listener;
requestCode);
void onRequestPermissionsResult(final int requestCode, final String[] permissions, final int[] grantResults) {
= Callback() {
void invoke(Object... args) {
(mPermissionListener != && mPermissionListener.onRequestPermissionsResult(requestCode, permissions, grantResults)) {
=
获取 Application中 ReactNativeHost
@return
ReactNativeHost getReactNativeHost() {
MainApplication.getInstance().getReactNativeHost();
获取 ReactInstanceManager
@return
ReactInstanceManager getReactInstanceManager() {
getReactNativeHost().getReactInstanceManager();
|
代码很长,重点在onCreate方法:
?
1 2 3 4 5 6 7 8 9 10 11 12 13 14 15 |
(mMainComponentName != && !needsOverlayPermission) {
1.从缓存中获取RootView
= ReactNativePreLoader.getReactRootView(mMainComponentName);
== {
2.缓存中不存在RootView,直接创建
= ReactRootView(mActivity);
3.将RootView设置到Activity布局
|
(1)首先从缓存中取ReactRootView
(2)缓存中不存在ReactRootView,直接创建。此时和系统帮我们创建ReactRootView没有区别
(3)将ReactRootView设置到Activity布局
很明显,我们让加载流程先经过缓存,如果缓存中已经存在了RootView,那么就可以直接设置到Activity布局,如果缓存中不存在,再去执行创建过程。
?
1 |
|
我们在启动React Native前一个界面,执行preLoad方法优先加载出ReactRootView,此时就完成了视图预加载,让React Native界面达到秒显的效果。
四、效果对比
优化前: 优化后:
Ok,到此想必大家都想撸起袖子体验一下了,那就开始吧~~ 源码已分享到Github,别忘了给颗star哦~
项目源码:https://github.com/songxiaoliang/ReactNativeApp
以上是 基于最新版本React Native实现JsBundle预加载,界面秒开优化 的全部内容, 来源链接: utcz.com/z/382544.html

