React Native开源库react-native-image-crop-picker使用图解

一、开源库介绍
目前大多数App都有头像展示的功能,在实际开发中,用户更换头像的需求屡见不鲜,社交方面的更为明显。在React Native的开发下,同样需要这样的功能来完善App需求。众多优秀的开源库让我们在自己的项目中使用起来非常方便。例如:react-native-image-picker。该库可以实现启动本地相册和照相机来采集图片,但是作者没有实现裁剪功能,针对头像上传的需求,一般都需要对图片进行裁剪。所以本篇和大家分享另一个开源库:react-native-image-crop-picker。该库同样实现了本地相册和照相机来采集图片,并且提供多选、图片裁剪等功能,支持iOS和Android两个平台,不同平台需要分别配置,github上有详细的文字说明。但是好多小伙伴都是android或者ios开发,可能对Android或IOS不熟悉,配置起来会遇到很多问题,所以,我将以图示的方式简化配置步骤,集成更为方便。http://blog.csdn.net/u013718120/article/details/72781285
二、集成
[html] view
plain copy
npm i react-native-image-crop-picker --save
react-native link react-native-image-crop-picker
三、配置
1. Android平台
(1)Gradle版本必须大于2.2,例如react Native 0.44 创建项目,查看工程的build.gradle中默认gradle版本:
[html] view
plain copy
buildscript {
...
dependencies {
classpath 'com.android.tools.build:gradle:2.2.3'
...
}
...
}
(2)打开app下的build.gradle,在android / defaultConfig / 节点下添加useSupportLibrary:
[html] view
plain copy
android {
...
defaultConfig {
...
vectorDrawables.useSupportLibrary = true
...
}
...
}
(3)打开AndroidManifest.xml配置文件,添加相机权限:
[html] view
plain copy
<uses-permission android:name="android.permission.CAMERA"/>
2. ios平台
(1)声明权限
在Xcode中打开Info.plist,并添加带有值的字符串键NSPhotoLibraryUsageDescription,描述为什么需要访问用户照片 以及NSCameraUsageDescription和NSMicrophoneUsageDescription。
(2)添加依赖
Cocapods的用户
1> 在Deployment Info标签下,设置Deployment Target平台版本为:8.0'
2> 将pod'RSKImageCropper'和pod'QBImagePickerController'添加到Podfile
非Cocapods用户
1> 将node_modules / ios / ImageCropPickerSDK文件夹拖放的xcode项目根目录下。
2> 单info选项卡
在Deployment Info标签下,设置Deployment Target平台版本为:8.0'
在Target下点击General,选择Embedded Binaries单击+并添加RSKImageCropper.framework和QBImagePicker.framework
四、使用
1. 在UI文件中引入
[html] view
plain copy
import ImagePicker from 'react-native-image-crop-picker';
2. 使用
(1)从本地相册选择单幅图像
[html] view
plain copy
ImagePicker.openPicker({
width: 300,
height: 400,
cropping: true
}).then(image => {
console.log(' 图片路径:'+ image);
});
(2)调用多个图像
[html] view
plain copy
ImagePicker.openPicker({
multiple: true
}).then(images => {
console.log(images);
});
(3)启动相机拍照
[html] view
plain copy
ImagePicker.openCamera({
width: 300,
height: 400,
cropping: true
}).then(image => {
console.log(image);
});
(4)裁剪已有的图片
[html] view
plain copy
ImagePicker.openCropper({
path: 'my-file-path.jpg',
width: 300,
height: 400
}).then(image => {
console.log(image);
});
关于其他属性的使用,可以到github文档进行查看即可。
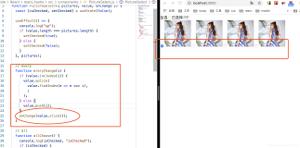
五、效果图
以上是 React Native开源库react-native-image-crop-picker使用图解 的全部内容, 来源链接: utcz.com/z/382092.html