node+vue的喵喵商城项目(一)

1.node后台服务器
2.vue构建前后端页面,vuex,vue-cli辅助使用
关于git多人协同开发项目:master分支不动,创建develop分支,在develop创建新的具体事项分支,然后merge到develop分支。
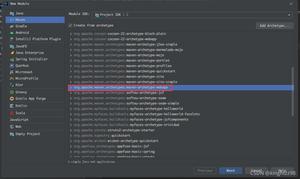
vue create m-miaomiao
git remote -v 查看仓库地址
git remote add origin https://gitee.com/lcglcglcg/m-miaomiao.git
git remote add miaomiao https://gitee.com/lcglcglcg/miaomiao.git // 添加多个远程分支。(可用于代码托管多个平台)。
关于 git pull 的使用注意:
git pull --rebase origin master 将远端代码拉取并合并到本地,同文件名远端覆盖
git checkout -b develop
git checkout -b createComponents
git add .
/*取消某次add 通过:git reset HEAD <file> 加具体文件名则取消单个文件,不加取消上次的全部*/
git commit -m \'createcomponents\'
/*添加暂存区的提交 : $ git commit -m \'initial commit\' $ git add forgotten_file $ git commit --amend */
git checkout develop
git merge createComponents --no-ff (加--no-ff的目的是把merge记录加入.git的log中,方便以后查看)
git log 查看日志
git push origin develop
git branch -d createComponents
删除远端分支:git push [远程名] :[分支名] eg: git push origin develop 即删除线上的develop分支。
目录的public 和 assets区别
assets:资源最终会打包到模块中,图片常转base64 存放
vuetr 插件 sca 自动生成页面模板
防止项目过大路由繁杂可以这样处理
关于路由中样式路由随着的切换:
在vue中有 .router-link-active 给指定的router-link 元素加上 eg: #footer ul li.router-link-active{ color: #f03d37;} 。
关于路由的任意未定义字符匹配指定页面:
{ path: \'/*\', redirect: \'/movie\' }
构建页面子路由时 path 可以加\'/\'代表完整地址,不加代表\'当前页面path/子路由。
vue add xxx eg:axios 可以增加vue-cli内置好的模块
axios前端跨域处理
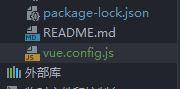
根目录新建 vue.config.js
添加
module.exports = { devServer: {
proxy: \'http://192.168.0.1:4000\',
ws:true
changeOrigin: true
} }
关于处理页面局部滚动问题:
确保有滚动主元素,才能设置其的scrollTop值,(ps:也可以用滚动元素的 scrollTo()方法)
this.$refs.scroll.scrollTo(0,this.$refs[index][0].offsetTop) //此方式类似于利用a标签的锚点方式
其中:绑定动态:ref元素需要使用this.$refs[index][0]才能访问到。具体关于offsetTop不同浏览器的规定可以查询
(ps: 不使用js原生方式获取元素主要是和vue的设计理念不同)
最简单的做法是利用 <a herf="#">的锚点绑定效果 给元素绑定动态id 利用锚点定位位置。
定义全局过滤器解决图片地址需要自己设置宽高问题
// 定义全局过滤器Vue.filter(\'setWH\', (url, arg)=>{
return url.replace(/w\.h/, arg)
})
(ps:对于这时图片可能出现的失帧问题:是setWH(‘arg)填写错误导致后台地址判断识别为最小图片导致,arg是字符串类型 需加引号。)
关于使用watch computed的区别
compueted:计算属性不适合炒作需要发送axios异步请求的数据,适合逻辑计算。
watch:可以监听数据的改变发送异步请求
注意,在写任何axios请求的时候 必须先加async await;
vue-axios防止数据多次请求的方法
<script>import axios from \'axios\'
export default {
data() {
return {
message: \'\',
movieList: [],
}
},
methods: {
cancelRequest(){
if(typeof this.source ===\'function\'){
this.source(\'终止请求\')
}
}
},
watch: {
async message(newVal) {
let that = this
this.cancelRequest()
await this.$axios.get(`api/searchList?cityId=10&kw=${newVal}`,{
cancelToken: new axios.CancelToken(c => {
that.source = c
})
}).then(res=> {
this.movieList = res.data.data.movies.list
}).catch((err) => {
if (axios.isCancel(err)) {
console.log(\'Request canceled\', err.message);
} else {
console.log(err)
}
})
// this.$axios.get(`api/searchList?cityId=10&kw=${newVal}`,{
// cancelToken: new axios.CancelToken(function(c){
// that.source = c
// })
// }).then(res=> {
// this.movieList = res.data.data.movies.list
// })
// .catch((err) => {
// if (axios.isCancel(err)) {
// console.log(\'Request canceled\', err.message);
// } else {
// console.log(err)
// }
// })
}
}
}
</script>
说明:这里的axios最初写的是 this.$axios 但始终报错 this.$axios.CancelToken is not construct 无奈只好 再次引入了一次 axios 才成功,不知是否是在安装axios时采用了 vue add axios 导致的?
vue-axios同时执行多个请求
axios.all([axios.get(\'https://api.github.com/xxx/1\'),
axios.get(\'https://api.github.com/xxx/2\')
])
.then(axios.spread(function (userResp, reposResp) {
// 上面两个请求都完成后,才执行这个回调方法
console.log(\'User\', userResp.data);
console.log(\'Repositories\', reposResp.data);
}));
当所有的请求都完成后,会收到一个数组,包含着响应对象,其中的顺序和请求发送的顺序相同,可以使用 axios.spread 分割成多个单独的响应对象
scroll组件的封装:props属性既可以接收值类型的传递,也可以接受方法的传递
<template><div class="wrapper" ref="wrapper">
<slot></slot>
</div>
</template>
<script>
import Bscroll from \'better-scroll\'
export default {
props: {
handleToScroll: {type: Function, default: function(){}},
handleToTouchEnd: {type: Function, default: function(){}},
},
mounted() {
let scroll = new Bscroll(this.$refs.wrapper, {
tap: true,
probeType: 1
})
this.scroll = scrollscroll.on(\'scroll\', (pos) => {
this.handleToScroll(pos)
})
scroll.on(\'touchEnd\', pos => {
this.handleToTouchEnd(pos)
})
},
methods: {
handleScrollTo(y){
this.scroll.scrollTo(0, y)
}
}}
</script>
<style scoped>
.wrapper {
height: 100%;
}
</style>
对于固定不变的资源没有必要请求多次,可以添加到window.localStorage.setItem()里面。例如城市数据的请求。
async fetch() { let cities = window.localStorage.getItem(\'cities\')
let hotCities = window.localStorage.getItem(\'hotCities\')
if(cities && hotCities){
this.cities = JSON.parse(cities)
this.hotCities = JSON.parse(hotCities)
this.isLoading = false
}else {
const res = await this.$axios.get(\'api/cityList\')
if(res.data.msg === \'ok\') {
this.isLoading = false
let cities = res.data.data.cities
// [{index: \'B\', list:[{id: 1, nm: "北京", isHot: 1, py: "beijing"}]}]
const {cityList, hotList} = this.formatCityList(cities)
this.cities = cityList
this.hotCities = hotList
window.localStorage.setItem(\'cities\', JSON.stringify(this.cities))
window.localStorage.setItem(\'hotCities\', JSON.stringify(this.hotCities))
}
}
},
关于better-scroll:
使用 npm i better-scroll@next -S 安装2版本会出现tap事件无效的问题,移动适配不佳的问题。npm i better-scroll -S 安装1版本则没有出现类似问题
网上查询better-scroll的问题:
点击事件无效:添加参数设置,参考官方文档https://ustbhuangyi.github.io/better-scroll/doc/zh-hans/options.html#click
pc端出现点击一次多次触发:在pc端添加 scroll的destroy()事件:销毁 better-scroll,解绑事件
关于出现一个组件内需要渲染多个router-view 的情况 可以采用vue的命名视图解决
// 路由端{
path: \'detail\',
components: {
detail: ()=> import (\'@/components/movie/Detail\')
}
},
// 页面端
<router-view name="detail"></router-view>
//具体参考vue官网
而通过命名视图的方式解决跳转问题则需要如下操作
路由端
{path: \'detail/:movieId\',
components: {
detail: ()=> import (\'@/components/movie/Detail\')
},
props: { detail: true }
},
页面端
props: {
movieId: {required: true}
},
也可以写成: props:[\'movieId\']
关于detail页面在渲染时,我试着通过路由加props:true参数来解决接收传入的id的问题
routes: [movieRouter,cinemaRouter,mineRouter,
{path: \'/\', redirect: \'/movie\'},
{
path: \'/detail/:movieId\',
component: ()=> import (\'@/components/movie/Detail\'),
props: true
},
]
然后将movie中的nowing页面的h2标签改写为router-link,但页面跳转不了,尝试过a标签,发现也不能跳转,再次在非scroll组件标签内加router-link发现可以跳转,在尝试在其他的自定义组件header中加入router-link也可以点击
得出:scroll组件会使router-link,a标签失效。
所以只好通过scroll的tap事件来跳转路由 this.$router.push(`/detail/${movieId}`)
再由nowing页面切换到detail页面的时候 ,由于命名视图只渲染命名的<router-view name="detail" /> ,加上屏幕之间的滑动动画效果,会出现nowing页面默认的<router-view/>没有渲染出现空白,导致不好的交互体验。
解决方法:
{ path: \'nowing/detail/:movieId\',
components: {
default: () => import(\'@/components/movie/Nowing\'),
detail: ()=> import (\'@/components/movie/Detail\')
},
props: { detail: true }
},
{
path: \'comming/detail/:movieId\',
components: {
default: () => import(\'@/components/movie/Comming\'),
detail: ()=> import (\'@/components/movie/Detail\')
},
props: { detail: true }
},
ps:如果存在很多个页面的指向问题,这样的做法是否存在优化方案?(待解决)
swiper组件缩略图的写法待掌握 eg:http://bbs.swiper.com.cn/forum.php?mod=viewthread&tid=24338
添加动态背景图:
:style="{ \'background-image\': \'url(\'+ detailMovie.videoImg.replace(/w\.h/, \'148.208\') +\')\'}"filter:blur(5px); 调整元素的模糊度
一个‘/’的差别,在页面数据的获取中,由于之前看过其他的视频教程在前端页面获取数据this.$axios.get(‘api/xxx’)和这样写this.$axios.get(\'/api/xxx\')都能请求获得数据,故以为两者是一样的,所以在这个项目中一直采取的前一种写法,
但在这个项目中将原本路由的hash模式改成history模式时,在路由中加了
export default new Router({ mode: \'history\',
base: \'miaomiao\',
routes: [
movieRouter,cinemaRouter,mineRouter,
{path: \'/\', redirect: \'/movie\'},
]
})
在vue.config.js中写入
module.exports = { publicPath: \'/miaomiao/\',
devServer: {
proxy: {
\'/api\': {
target: \'http://39.97.33.178\',
changeOrigin: true
},
}
}
}
多次不同更改打包出错,最后发现是‘/’的锅,虽然没有找到两者的区别以及问题的关键所在,但赤裸裸时间的教训一定要写‘/’。(暂猜测原因:不跨域请求数据,应该都一样的,一但跨域,一定加‘/’)。
在没有加‘/’,路由是hash模式的时候,直接打包,不能设置根目录文件夹base,放在niginx html 根目录下能成功。
niginx.conf配置如下
location /miaomiao/ { root html;
index index.html index.htm;
try_files $uri $uri/ /miaomiao/index.html;
}
location /api/ {
proxy_set_header x-Real-IP $remote_addr;
proxy_pass http://39.97.33.178/api/; //上面是niginx代理重定向到真实服务器的地址
proxy_redirect off; //下面这部分是取消重定向,获取用户的信息定位用户的所在地。
proxy_set_header X-Forwarded_For $proxy_add_x_forwarded_for;
proxy_set_header Host $http_host;
proxy_set_header X-Niginx-Proxy true;
}
在服务器端采用niginx负载均衡和反向代理,用pm2做服务器的后台进程管理。
以上是 node+vue的喵喵商城项目(一) 的全部内容, 来源链接: utcz.com/z/379396.html