tomcat部署前端vue项目

1、将前端请求的后台的路径改为后台tomcat的端口,由于我的后台部署在tomcat中,tomcat的端口为8081,故:
// 创建axios实例const service = axios.create({
baseURL: \'http://localhost:8081/api\',
timeout: 5000000
});
注意:如果部署到云服务器中,那么就不能写localhost,而应该写云服务器的ip。
2、config/index.js中的代码如下:
\'use strict\'const path = require(\'path\')
module.exports = {
dev: {
// Paths
assetsSubDirectory: \'static\',
assetsPublicPath: \'/\',
host: \'localhost\', // can be overwritten by process.env.HOST
port: 9528, // can be overwritten by process.env.PORT, if port is in use, a free one will be determined
autoOpenBrowser: true,
errorOverlay: true,
notifyOnErrors: false,
poll: false, // https://webpack.js.org/configuration/dev-server/#devserver-watchoptions-
useEslint: true,
showEslintErrorsInOverlay: false,
/**
* Source Maps
*/
devtool: \'cheap-source-map\',
cssSourceMap: false
},
build: {
index: path.resolve(__dirname, \'../dist/index.html\'),
// Paths
assetsRoot: path.resolve(__dirname, \'../dist\'),
assetsSubDirectory: \'static\',
assetsPublicPath: \'/\',
productionSourceMap: false,
devtool: \'source-map\',
productionGzip: false,
productionGzipExtensions: [\'js\', \'css\'],
bundleAnalyzerReport: process.env.npm_config_report || false,
generateAnalyzerReport: process.env.npm_config_generate_report || false
}
}
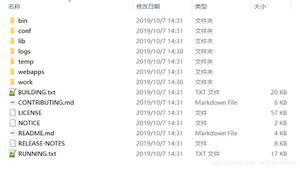
3、前端用npm run build打包,生成dist目录。在tomcat的webapp中新建ROOT目录,将dist目录下的文件拷贝到ROOT目录中,设置tomcat端口为8081,启动tomcat
4、访问http://localhost:8082/
注意:本地笔记本访问http://云服务器IP:8082/,前端会访问http://云服务器IP:8081/,所以腾讯云服务器要放开8081和8082两个端口。
5、查看tomcat是否启动成功的日志
tail -f logs/catalina.2021-12-15.out
以上是 tomcat部署前端vue项目 的全部内容, 来源链接: utcz.com/z/377236.html