Java获取彩色图像中的主色彩的实例代码
本文讲述了Java获取彩色图像中的主色彩的实例代码。分享给大家供大家参考,具体如下:
一:基本思路
对于一张RGB色彩空间的彩色图像,很多时间我们想通过程序获得该图像有几种主要的色彩,但是对一般图像来说,在色彩交界处都是通过像素混合来实现自然过渡,所以直接扫描图像的像素值,得到的不同颜色值可能多达上百中,而实际上图像可能只有3~4种的主要色彩,如何去掉那些混合颜色,准确提取出来这3~4中的主色彩,根据一般图像的特征,图像在不同色彩的边界处混合不同的颜色值,此可以视为图像的边缘特性之一,因此可以根据简单的边缘梯度算法实现这些混合像素的提取得到输出的像素值数组,然后扫描每个像素值,寻找指定半径参数R周围的像素,发现为零,而且距离中心像素最近的像素点的值做为中心像素的像素值,扫描结束以后输出像素数组,然后对数组线性扫描,即可得到图片的主要色彩RGB值。
二:实现步骤
1. 输入图像数组,对彩色图像灰度化;
2. 对灰度化以后的图像,计算图像梯度,这里使用sobol算子;
3. 对得到每一个非零像素点实现半径为R的范围内的扫描,找出与之最相近的为零的原像素值;
4. 对得到数组进行简单的扫描,得到主色彩。
其中参数R是要根据不同应用场景,找到最合适的值。理论上图像越大,R的取值也应该越大,否则算法会失准。
三:原图及运行效果
原图
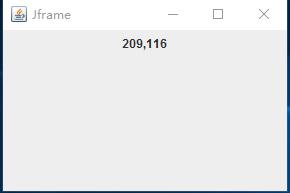
算法运行之后提取到四种主要色彩
四:算法实现源代码
public static BufferedImage removeBlendPixels(BufferedImage image, int raidus) {
int width = image.getWidth();
int height = image.getHeight();
int[] pixels = new int[width * height];
getRGB(image, 0, 0, width, height, pixels);
// 创建处理结果
BufferedImage resultImg = createCompatibleDestImage(image, null);
setRGB(resultImg, 0, 0, width, height, pixels);
// 灰度化与梯度求取
byte[] grayData = getGrayData(pixels, width, height);
byte[] binaryData = getGrident(grayData, width, height);
int index = 0;
for (int row = 1; row < height - 1; row++) {
for (int col = 1; col < width - 1; col++) {
index = row * width + col;
int pixel = (binaryData[index] & 0xff);
if (pixel > 0) {
// 半径扫描操作
int mindis = Integer.MAX_VALUE;
int minrow = -1;
int mincol = -1;
int nr = 0;
int nc = 0;
int index2 = 0;
for (int subrow = -raidus; subrow <= raidus; subrow++) {
nr = row + subrow;
if (nr < 0 || nr >= height) {
continue;
}
for (int subcol = -raidus; subcol <= raidus; subcol++) {
nc = col + subcol;
if (nc < 0 || nc >= width) {
continue;
}
index2 = nr * width + nc;
int value = (binaryData[index2] & 0xff);
if (value == 0) {
int distance = distanceColor(image.getRGB(nc, nr), image.getRGB(col, row));
if (distance < mindis) {
mindis = distance;
minrow = nr;
mincol = nc;
}
}
}
}
resultImg.setRGB(col, row, image.getRGB(mincol, minrow));
}
}
}
return resultImg;
}
public static int distanceColor(int rgb, int rgb2) {
// Color one
int r1 = (rgb >> 16) & 0xff;
int g1 = (rgb >> 8) & 0xff;
int b1 = rgb & 0xff;
// Color two
int r2 = (rgb2 >> 16) & 0xff;
int g2 = (rgb2 >> 8) & 0xff;
int b2 = rgb2 & 0xff;
// distance
int rr = r1 - r2;
int gg = g1 - g2;
int bb = b1 - b2;
int sum = (int) Math.sqrt(rr * rr + gg * gg + bb * bb);
return sum;
}
public static byte[] getGrayData(int[] inPixels, int width, int height) {
// 图像灰度化
byte[] outPixels = new byte[width * height];
int index = 0;
for (int row = 0; row < height; row++) {
int tr = 0, tg = 0, tb = 0;
for (int col = 0; col < width; col++) {
index = row * width + col;
tr = (inPixels[index] >> 16) & 0xff;
tg = (inPixels[index] >> 8) & 0xff;
tb = inPixels[index] & 0xff;
int gray = (int) (0.299 * tr + 0.587 * tg + 0.114 * tb);
outPixels[index] = (byte) (gray & 0xff);
}
}
return outPixels;
}
public static byte[] getGrident(byte[] inPixels, int width, int height) {
byte[] outPixels = new byte[width * height];
int index = 0;
for (int row = 0; row < height; row++) {
int tr = 0;
for (int col = 0; col < width; col++) {
if (row == 0 || col == 0 || (row == height - 1) || (col == width - 1)) {
index = row * width + col;
outPixels[index] = (byte) (0x00);
continue;
}
int xg = 0, yg = 0;
for (int sr = -1; sr <= 1; sr++) {
for (int sc = -1; sc <= 1; sc++) {
int nrow = row + sr;
int ncol = col + sc;
if (nrow < 0 || nrow >= height) {
nrow = 0;
}
if (ncol < 0 || ncol >= width) {
ncol = 0;
}
index = nrow * width + ncol;
tr = (inPixels[index] & 0xff);
xg += X_SOBEL[sr + 1][sc + 1] * tr;
yg += Y_SOBEL[sr + 1][sc + 1] * tr;
}
}
index = row * width + col;
int g = (int) Math.sqrt(xg * xg + yg * yg);
outPixels[index] = (byte) (clamp(g) & 0xff);
}
}
return outPixels;
}
需要定义的常量值如下:
public static final int[][] X_SOBEL = new int[][] { { -1, -2, -1 }, { 0, 0, 0 }, { 1, 2, 1 } };
public static final int[][] Y_SOBEL = new int[][] { { -1, 0, 1 }, { -2, 0, 2 }, { -1, 0, 1 } };
public static final int BLOCK_PIXEL_RADIUS = 5;
梯度求取使用是sobol算子,对处理以后的BufferedImage对象扫描获取主色彩的代码如下:
int width = result.getWidth();
int height = result.getHeight();
Map<Integer, Integer> colorIndexMap = new HashMap<Integer, Integer>();
for (int row = 0; row < height; row++) {
for (int col = 0; col < width; col++) {
int pixelValue = result.getRGB(col, row);
if (!colorIndexMap.containsKey(pixelValue)) {
colorIndexMap.put(pixelValue, pixelValue);
}
}
}
// now scan pixel value
// return result
System.out.println("number of color = " + colorIndexMap.size());
return colorIndexMap.keySet().toArray(new Integer[0]);
测试代码如下:
public static void main(String[] args) {
File file = new File("D:\\gloomyfish\\bigmonkey.png");
File resultFile = new File("D:\\gloomyfish\\result.png");
try {
BufferedImage image = ImageIO.read(file);
BufferedImage result = removeBlendPixels(image, BLOCK_PIXEL_RADIUS);
ImageIO.write(result, "png", resultFile);
Integer[] colors = extractColors(result);
System.out.println("total colors : " + colors.length);
} catch (IOException e) {
e.printStackTrace();
}
}
注意:主要的关键在于对待处理图像输入正确大小的半径,这个半径大小跟图像实际大小相关,而且算法可以近一步优化成不依赖半径参数的版本,知道找到等于零的像素为止。
以上是 Java获取彩色图像中的主色彩的实例代码 的全部内容, 来源链接: utcz.com/z/361027.html


