动态配置Spring Boot日志级别的全步骤
前言
项目使用了SpringBoot" title="SpringBoot">SpringBoot构建项目。下面对动态调整日志的级别进行记录。
从版本 1.5.1 之后就提供了基于 spring-boot-starter-actuator 的端点 /loggers。通过该端点可以实现查看系统的 package-path 的日志级别,以及针对特定的 package-path 配置运行中的应用的日志级别的功能。
Actuator 依赖
pom 依赖
因为是基于 Web 的项目和利用 Actuator 提供的端点来进行配置,因此需要依赖:
<dependency>
<groupId>org.springframework.boot</groupId>
<artifactId>spring-boot-starter-web</artifactId>
</dependency>
<dependency>
<groupId>org.springframework.boot</groupId>
<artifactId>spring-boot-starter-actuator</artifactId>
</dependency>
安全配置
Actuator 提供的端点(Endpoints),默认是需要安全认证才能够被访问的。因为里面涉及到一些敏感的信息。需要安全认证就需要配置 Spring-Security。为了方便首先配置不需要安全权限的。
management.security.enabled=false
GET 请求访问
我们可以发送GET 请求到 http://localhost:8091/loggers 来获取支持的日志等级,以及系统(ROOT)默认的日志等和各个包路径(com.mall.goods.zhongkui等)对应的日志级别。
{
levels: [
"OFF",
"FATAL",
"ERROR",
"WARN",
"INFO",
"DEBUG",
"TRACE"
],
loggers: {
ROOT: {
configuredLevel: "INFO",
effectiveLevel: "INFO"
},
com.mall.goods.zhongkui: {
configuredLevel: "DEBUG",
effectiveLevel: "DEBUG"
},
com.mall.goods.zhongkui.mallcpswomai.mapper: {
configuredLevel: "DEBUG",
effectiveLevel: "DEBUG"
}
}
}
配置日志级别
编写日志输出类
编写一个controller 输出各个级别的日志:
@Slf4j
@Controller
public class TestController {
@GetMapping(value = "/testLog")
public String testLog() {
log.info("---------------------------");
log.debug("debug debug");
log.info("info info info");
log.warn("warn warn warn");
log.error("error error error ");
log.info("---------------------------");
return "ok";
}
}
查看日志级别
启动应用访问 http://localhost:8091/ 得到:
[2018-07-30 18:05:42.868] [http-nio-8091-exec-2] INFO com.mall.goods.zhongkui.mallcpswomai.web.OrderRelationController----------------------------
[2018-07-30 18:05:42.869] [http-nio-8091-exec-2] DEBUG com.mall.goods.zhongkui.mallcpswomai.web.OrderRelationController-debug debug
[2018-07-30 18:05:42.869] [http-nio-8091-exec-2] INFO com.mall.goods.zhongkui.mallcpswomai.web.OrderRelationController-info info info
[2018-07-30 18:05:42.869] [http-nio-8091-exec-2] WARN com.mall.goods.zhongkui.mallcpswomai.web.OrderRelationController-warn warn warn
[2018-07-30 18:05:42.869] [http-nio-8091-exec-2] ERROR com.mall.goods.zhongkui.mallcpswomai.web.OrderRelationController-error error error
[2018-07-30 18:05:42.869] [http-nio-8091-exec-2] INFO com.mall.goods.zhongkui.mallcpswomai.web.OrderRelationController----------------------------
Spring Boot 默认的 ROOT 日志级别是INFO。
配置特定包的日志级别
通过 /loggers 端点提供的 POST 请求,修改包路径com.mall.goods.zhongkui 的日志级别为INFO。
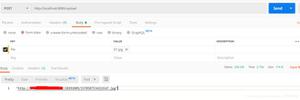
* 发送POST 请求到 http://localhost:8091/com.mall.goods.zhongkui,其中请求 Body 的内容如下:
{
"configuredLevel": "INFO"
}
•GET 访问 /loggers/com.mall.goods.zhongkui 查看当前的日志级别:
{
configuredLevel: "INFO",
effectiveLevel: "INFO"
}
•再次访问 http://localhost:8091/ 得到:需要注意的是,通过 /loggers 配置的日志级别在应用重启时会恢复到系统的配置。如果想永久的配置日志的级别还是需要通过logging.level.package-path 来进行配置。
总结
Spring Boot 提供的日志级别动态配置功能,为我们的线上应用调试提供了很好的机制。在实际使用中需要结合 Spring-Security 提供的安全机制来保护Actuator 提供的各种系统级端点。
参考
1.Configure a Logger
好了,以上就是这篇文章的全部内容了,希望本文的内容对大家的学习或者工作具有一定的参考学习价值,谢谢大家对的支持。
以上是 动态配置Spring Boot日志级别的全步骤 的全部内容, 来源链接: utcz.com/z/342054.html


