Java HashMap 如何正确遍历并删除元素的方法小结
(一)HashMap的遍历
HashMap的遍历主要有两种方式:
第一种采用的是foreach模式,适用于不需要修改HashMap内元素的遍历,只需要获取元素的键/值的情况。
HashMap<K, V> myHashMap;
for (Map.entry<K, V> item : myHashMap.entrySet()){
K key = item.getKey();
V val = item.getValue();
//todo with key and val
//WARNING: DO NOT CHANGE key AND val IF YOU WANT TO REMOVE ITEMS LATER
}
第二种采用迭代器遍历,不仅适用于HashMap,对其它类型的容器同样适用。
采用这种方法的遍历,可以用下文提及的方式安全地对HashMap内的元素进行修改,并不会对后续的删除操作造成影响。
for (Iterator<Map.entry<K, V>> it = myHashMap.entrySet().iterator; it.hasNext();){
Map.Entry<K, V> item = it.next();
K key = item.getKey();
V val = item.getValue();
//todo with key and val
//you may remove this item using "it.remove();"
}
(二)HashMap之删除元素
如果采用第一种的遍历方法删除HashMap中的元素,Java很有可能会在运行时抛出异常。
HashMap<String, Integer> myHashMap = new HashMap<>();
myHashMap.put("1", 1);
myHashMap.put("2", 2);
for (Map.Entry<String, Integer> item : myHashMap.entrySet()){
myHashMap.remove(item.getKey());
}
for (Map.Entry<String, Integer> item : myHashMap.entrySet()){
System.out.println(item.getKey());
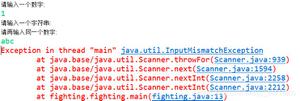
运行上面的代码,Java抛出了 java.util.ConcurrentModificationException 的异常。并附有如下信息。
at java.util.HashMap$HashIterator.nextNode(Unknown Source)
at java.util.HashMap$EntryIterator.next(Unknown Source)
at java.util.HashMap$EntryIterator.next(Unknown Source)
可以推测,由于我们在遍历HashMap的元素过程中删除了当前所在元素,下一个待访问的元素的指针也由此丢失了。
所以,我们改用第二种遍历方式。
代码如下:
for (Iterator<Map.Entry<String, Integer>> it = myHashMap.entrySet().iterator(); it.hasNext();){
Map.Entry<String, Integer> item = it.next();
//... todo with item
it.remove();
}
for (Map.Entry<String, Integer> item : myHashMap.entrySet()){
System.out.println(item.getKey());
}
运行结果没有显示,表明HashMap中的元素被正确删除了。
(三)在HashMap的遍历中删除元素的特殊情况
上述方法可能足以应付多数的情况,但是如果你的HashMap中的键值同样是一个HashMap,假设你需要处理的是 HashMap<HashMap<String, Integer>, Double> myHashMap 时,很不碰巧,你可能需要修改myHashMap中的一个项的键值HashMap中的某些元素,之后再将其删除。
这时,单单依靠迭代器的 remove() 方法是不足以将该元素删除的。
例子如下:
HashMap<HashMap<String, Integer>, Integer> myHashMap = new HashMap<>();
HashMap<String, Integer> temp = new HashMap<>();
temp.put("1", 1);
temp.put("2", 2);
myHashMap.put(temp, 3);
for (Iterator<Map.Entry<HashMap<String, Integer>, Integer>>
it = myHashMap.entrySet().iterator(); it.hasNext();){
Map.Entry<HashMap<String, Integer>, Integer> item = it.next();
item.getKey().remove("1");
System.out.println(myHashMap.size());
it.remove();
System.out.println(myHashMap.size());
}
结果如下:
1
1
虽然 it.remove(); 被执行,但是并没有真正删除元素。
原因在于期望删除的元素的键值(即 HashMap<String, Integer> temp )被修改过了。
解决方案:
既然在这种情况下,HashMap中被修改过的元素不能被删除,那么不妨直接把待修改的元素直接删除,再将原本所需要的“修改过”的元素加入HashMap。
想法很好,代码如下:
for (Iterator<Map.Entry<HashMap<String, Integer>, Integer>>
it = myHashMap.entrySet().iterator(); it.hasNext();){
Map.Entry<HashMap<String, Integer>, Integer> item = it.next();
//item.getKey().remove("1");
HashMap<String, Integer> to_put = new HashMap<>(item.getKey());
to_put.remove("1");
myHashMap.put(to_put, item.getValue());
System.out.println(myHashMap.size());
it.remove();
System.out.println(myHashMap.size());
}
但是依然是RE:
Exception in thread "main" java.util.ConcurrentModificationException
at java.util.HashMap$HashIterator.remove(Unknown Source)
原因在于,迭代器遍历时,每一次调用 next() 函数,至多只能对容器修改一次。上面的代码则进行了两次修改:一次添加,一次删除。
既然 java.util.ConcurrentModificationException 异常被抛出了,那么去想办法拿掉这个异常即可。
最后的最后,我决定弃HashMap转投ConcurrentHashMap。将myHashMap定义为ConcurrentHashMap之后,其它代码不动。
运行结果如下:
2
1
最终,通过ConcurrentHashMap和一些小技巧的使用,变形实现了对被修改过键值的元素的删除。
以上是 Java HashMap 如何正确遍历并删除元素的方法小结 的全部内容, 来源链接: utcz.com/z/332713.html

