vue-cli 3.0 自定义vue.config.js文件,多页构建的方法
使用自己基于vue-cli 2.X改造的前端多页脚手架有近1年多时间了,一直没机会升级3.0版本
开始零零碎碎开始写一些功能,顺便分享一下
const path = require('path')
const glob = require('glob')
/** 获取多页的入口脚本和模板 */
const getPages = (() => {
const [
globPathHtml,
globPathJs,
pages,
tempSet
] = [
['./src/modules/**/index.html', 'template'], // 入口模板正则
['./src/modules/**/main.js', 'entry'], // 入口脚本正则
Object.create(null),
new Set()
]
const getMultiPageConf = (globPath, keyName) => {
let [fileList, tempArr, modName] = [glob.sync(globPath), [], null]
if (fileList.length !== 0) {
for (let entry of fileList) {
tempArr = path.dirname(entry, path.extname(entry)).split('/')
modName = tempArr[tempArr.length - 1]
if (tempSet.has(modName)) {
Object.assign(pages[modName], { [keyName]: entry, 'filename': `${modName}.html` })
} else {
Reflect.set(pages, modName, { [keyName]: entry }) && tempSet.add(modName)
}
}
return true
} else {
if (keyName === 'template') {
throw new Error('无法获取多页入口模板')
} else if (keyName === 'entry') {
throw new Error('无法获取多页入口脚本')
} else {
throw new Error('无法获取多页信息')
}
}
}
try {
while (getMultiPageConf(...globPathHtml) && getMultiPageConf(...globPathJs)) return pages
} catch (err) {
console.log('获取多页数据错误:', err)
}
})()
console.log('pages: ', getPages)
打印结果:
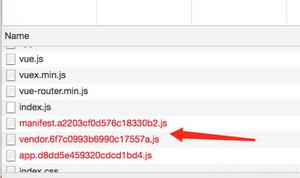
pages: { mod1:
{ template: './src/modules/mod1/index.html',
entry: './src/modules/mod1/main.js',
filename: 'mod1.html' },
mod2:
{ template: './src/modules/mod2/index.html',
entry: './src/modules/mod2/main.js',
filename: 'mod2.html' },
mod3:
{ template: './src/modules/mod3/index.html',
entry: './src/modules/mod3/main.js',
filename: 'mod3.html' } }
使用:
/** vue.config.js */
module.exports = {
...
pages: getPages
...
}
以上这篇vue-cli 3.0 自定义vue.config.js文件,多页构建的方法就是小编分享给大家的全部内容了,希望能给大家一个参考,也希望大家多多支持。
以上是 vue-cli 3.0 自定义vue.config.js文件,多页构建的方法 的全部内容, 来源链接: utcz.com/z/318945.html