linux系统下创建lvm挂载到指定目录的操作步骤
1 、背景
在企业中有时我们为方便安装软件、数据的管理,需要把安装软件、数据放到固定目录下,磁盘满了方便扩展,这里假如需要一个/data目录存放数据,并单独进行挂载。
2、操作步骤
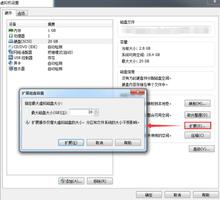
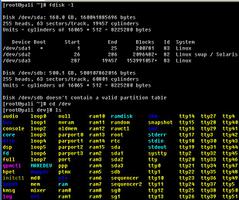
2.1 划分磁盘
2.2 创建PV
[root@centos-6 ~]# pvcreate /dev/sdb1
Physical volume "/dev/sdb1" successfully created
扫描系统PV可以使用pvscan查看新建的PV
[root@centos-6 ~]# pvscan
PV /dev/sda2 VG VolGroup lvm2 [19.51 GiB / 0 free]
PV /dev/sdb1 lvm2 [10.00 GiB]
Total: 2 [29.51 GiB] / in use: 1 [19.51 GiB] / in no VG: 1 [10.00 GiB]
2.3 创建VG
[root@centos-6 ~]# vgcreate vgtest /dev/sdb1
Volume group "vgtest" successfully created
注释:vgtest 为VG的名称
扫描vg
[root@centos-6 ~]# vgscan
Reading all physical volumes. This may take a while...
Found volume group "vgtest" using metadata type lvm2
Found volume group "VolGroup" using metadata type lvm2
查看vg
[root@centos-6 ~]# vgdisplay
--- Volume group ---
VG Name vgtest
System ID
Format lvm2
Metadata Areas 1
Metadata Sequence No 1
VG Access read/write
VG Status resizable
MAX LV 0
Cur LV 0
Open LV 0
Max PV 0
Cur PV 1
Act PV 1
VG Size 10.00 GiB
PE Size 4.00 MiB
Total PE 2560
Alloc PE / Size 0 / 0
Free PE / Size 2560 / 10.00 GiB
VG UUID 59Z2ML-CEzB-PivW-zNq9-2kbv-hscJ-drFdR9
--- Volume group ---
VG Name VolGroup
System ID
Format lvm2
Metadata Areas 1
Metadata Sequence No 3
VG Access read/write
VG Status resizable
MAX LV 0
Cur LV 2
Open LV 2
Max PV 0
Cur PV 1
Act PV 1
VG Size 19.51 GiB
PE Size 4.00 MiB
Total PE 4994
Alloc PE / Size 4994 / 19.51 GiB
Free PE / Size 0 / 0
VG UUID UPJDXo-8RjG-muVj-nVnt-hjXI-aZVv-uGGc2x
2.4 创建LV
[root@centos-6 ~]# lvcreate -l 2560 -n lvdata vgtest
Logical volume "lvdata" created.
2.5 格式化创建的LV
[root@centos-6 ~]# mkfs -t ext4 /dev/vgtest/lvdata
mke2fs 1.41.12 (17-May-2010)
文件系统标签=
操作系统:Linux
块大小=4096 (log=2)
分块大小=4096 (log=2)
Stride=0 blocks, Stripe width=0 blocks
655360 inodes, 2621440 blocks
131072 blocks (5.00%) reserved for the super user
第一个数据块=0
Maximum filesystem blocks=2684354560
80 block groups
32768 blocks per group, 32768 fragments per group
8192 inodes per group
Superblock backups stored on blocks:
32768, 98304, 163840, 229376, 294912, 819200, 884736, 1605632
正在写入inode表: 完成
Creating journal (32768 blocks): 完成
Writing superblocks and filesystem accounting information: 完成
This filesystem will be automatically checked every 39 mounts or
180 days, whichever comes first. Use tune2fs -c or -i to override.
2.6 创建目录并挂载
创建目录:
[root@centos-6 ~]# mkdir -p /data
挂载目录
[root@centos-6 ~]# mount /dev/vgtest/lvdata /data
查看
[root@centos-6 ~]# df -h
Filesystem Size Used Avail Use% Mounted on
/dev/mapper/VolGroup-lv_root 18G 4.9G 12G 30% /
tmpfs 125M 72K 125M 1% /dev/shm
/dev/sda1 477M 37M 416M 9% /boot
/dev/mapper/vgtest-lvdata 9.8G 23M 9.2G 1% /data
2.7 设置开机挂载
[root@centos-6 ~]# vi /etc/fstab
#
# /etc/fstab
# Created by anaconda on Sat Feb 3 00:44:14 2018
#
# Accessible filesystems, by reference, are maintained under '/dev/disk'
# See man pages fstab(5), findfs(8), mount(8) and/or blkid(8) for more info
#
/dev/mapper/VolGroup-lv_root / ext4 defaults 1 1
UUID=49120546-3d8d-4b2e-8559-448613dc072a /boot ext4 defaults 1 2
/dev/mapper/VolGroup-lv_swap swap swap defaults 0 0
tmpfs /dev/shm tmpfs defaults 0 0
devpts /dev/pts devpts gid=5,mode=620 0 0
sysfs /sys sysfs defaults 0 0
proc /proc proc defaults 0 0
/dev/mapper/vgtest-lvdata /data ext4 defaults 0 0
总结
以上所述是小编给大家介绍的linux系统下创建lvm挂载到指定目录的操作步骤,希望对大家有所帮助,如果大家有任何疑问欢迎给我留言,小编会及时回复大家的!
以上是 linux系统下创建lvm挂载到指定目录的操作步骤 的全部内容, 来源链接: utcz.com/z/313390.html


