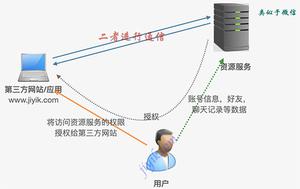
springboot2.x实现oauth2授权码登陆的方法
一 进行授权页
浏览器输入 http://localhost:8081/oauth/authorize?response_type=code&redirect_uri=http://localhost:8081/callback&client_id=android1&scop=all
二 使用资源站用户登陆
自动跨到资源登陆页,先登陆
三 授权资源类型
登陆成功后,去授权你的资源,这些资源是在AuthorizationServerConfig.configure方法里配置的
@Override
public void configure(ClientDetailsServiceConfigurer clients) throws Exception {
clients.inMemory()
.withClient(ClientID)
.secret(passwordEncoder.encode(ClientSecret))
.authorizedGrantTypes("authorization_code", "refresh_token",
"password", "implicit")
.scopes("read","write","del","userinfo")
.redirectUris(RedirectURLs);
}
四 接到code
授权之后,系统会重定向到你的redirect_uri这个页面,并带上唯一的code
五 获取access_token
我们拿着code就要再去授权服务器去获取token了,你可以在你的代码里写这个,也可以手动拿着code,去拼成一个url,再去拿token,就像这下面的实例。
注意向oauth/token发的是post请求,client_id和client_secret如果在url上传递,如果在AuthorizationServerConfig类的configure方法中开启allowFormAuthenticationForClients,代码如下
@Override
public void configure(AuthorizationServerSecurityConfigurer oauthServer) throws Exception {
oauthServer.tokenKeyAccess("permitAll()")
.checkTokenAccess("isAuthenticated()")
.allowFormAuthenticationForClients();//支持把secret和clientid写在url上,否则需要在头上
}
然后请求后给有下面的响应
Authorization Ccode------RFRLFY
access_token_url http://localhost:8081/oauth/token?client_id=android1&code=RFRLFY&grant_type=authorization_code&redirect_uri=http://localhost:8081/callback&client_secret=android1
Access Token Response ---------{"access_token":"faadf3bf-6488-4036-bc3b-21b0a979602c","token_type":"bearer","refresh_token":"1b01f133-c5ab-419f-8125-088c85916ecb","expires_in":43187,"scope":"read"}
回调页面代码,主要实现了对code的获取,对access_token的组织,然后请求时把access_token带上,这个方法一般会做成公用的过滤器
@Controller
public class UserController {
@RequestMapping(value = "/callback", method = RequestMethod.GET)
public ResponseEntity<String> callback(@RequestParam("code") String code) throws JsonProcessingException, IOException {
ResponseEntity<String> response = null;
System.out.println("Authorization Ccode------" + code);
RestTemplate restTemplate = new RestTemplate();
String access_token_url = "http://localhost:8081/oauth/token";
access_token_url += "?client_id=android1&code=" + code;
access_token_url += "&grant_type=authorization_code";
access_token_url += "&redirect_uri=http://localhost:8081/callback";
access_token_url += "&client_secret=android1";
System.out.println("access_token_url " + access_token_url);
response = restTemplate.exchange(access_token_url, HttpMethod.POST, null, String.class);
ObjectMapper mapper = new ObjectMapper();
JsonNode node = mapper.readTree(response.getBody());
String token = node.path("access_token").asText(); System.out.println("access_token" +access_token);
String url = "http://localhost:8081/index"; HttpHeaders headers1 = new HttpHeaders(); headers1.add("Authorization", "Bearer " + token); HttpEntity<String> entity = new HttpEntity<>(headers1); ResponseEntity<String> result = restTemplate.exchange(url, HttpMethod.GET, entity, String.class); return result; }
六 拿着access_token去请求具体的资源
可以在url地址上直接:http://localhost:8081/index?access_token=faadf3bf-6488-4036-bc3b-21b0a979602c
总结
以上所述是小编给大家介绍的springboot2.x实现oauth2授权码登陆的方法,希望对大家有所帮助,如果大家有任何疑问请给我留言,小编会及时回复大家的。在此也非常感谢大家对网站的支持!
如果你觉得本文对你有帮助,欢迎转载,烦请注明出处,谢谢!
以上是 springboot2.x实现oauth2授权码登陆的方法 的全部内容, 来源链接: utcz.com/z/312496.html