Spring详细教程
本文内容纲要:
- Spring学习总结----- 一、导入Spring必须的jar包
- 二、简单示例入门注入一个User
- 三、Bean的配置深入
- 四、通过注解配置bean
- 十、使用SpringAOP完成简单的程序
- 十一、SpringAOP整合Hibernate并使用事务(模拟买书的过程)
Spring学习总结----
一、导入Spring必须的jar包

二、简单示例入门注入一个User
1.编写User实体类
package test.Spring.helloworld;import java.util.List;
import java.util.Map;
public class User {
@Override
public String toString() {
return "User [id=" + id + ", name=" + name + "]";
}
public int getId() {
return id;
}
public void setId(int id) {
this.id = id;
}
public String getName() {
return name;
}
public void setName(String name) {
this.name = name;
}
private int id;
private String name;
}
2.编写Spring配置文件,类型为xml,文件名可以自定义
<?xml version="1.0" encoding="UTF-8"?><beans xmlns="http://www.springframework.org/schema/beans"
xmlns:xsi="http://www.w3.org/2001/XMLSchema-instance"
xsi:schemaLocation="http://www.springframework.org/schema/beans
http://www.springframework.org/schema/beans/spring-beans.xsd"
>
<bean id="User" class="test.Spring.helloworld.User">
<property name="id" value="1"></property>
<property name="name" value="jayjay"></property>
</bean>
</beans>
3.利用Spring容器创建托管对象User
ApplicationContext context =new ClassPathXmlApplicationContext("applicationContext.xml"); User u = (User)context.getBean("User");
System.out.println(u);
三、Bean的配置深入
1.bean引用其他bean
实体类示例:
package test.Spring.helloworld;public class HelloWorld {
public User getUser() {
return user;
}
public void setUser(User user) {
this.user = user;
}
@Override
public String toString() {
return "HelloWorld [name=" + name + ", user=" + user + "]";
}
public String getName() {
return name;
}
public void setName(String name) {
this.name = name;
}
private String name;
private User user;
public HelloWorld(){
}
public HelloWorld(String name){
this.name = name;
}
}
配置示例:
<!-- reference other bean --> <bean id="HelloWorld" class="test.Spring.helloworld.HelloWorld">
<!-- <property name="name" value="spring1"></property> -->
<constructor-arg value="spring2" type="java.lang.String"></constructor-arg>
<property name="user">
<ref bean="User"/>
</property>
</bean>
调用方法依然是根据bean中的id
2.集合bean配置
实体类示例:
package test.Spring.helloworld;import java.util.List;
import java.util.Map;
public class User {
public Map<String, Integer> getMap() {
return map;
}
public void setMap(Map<String, Integer> map) {
this.map = map;
}
public List<String> getList() {
return list;
}
public void setList(List<String> list) {
this.list = list;
}
@Override
public String toString() {
return "User [id=" + id + ", name=" + name + ", list=" + list
+ ", map=" + map + "]";
}
public int getId() {
return id;
}
public void setId(int id) {
this.id = id;
}
public String getName() {
return name;
}
public void setName(String name) {
this.name = name;
}
private int id;
private String name;
private List<String> list;
private Map<String,Integer> map;
}
配置示例:
<!-- Configure the list bean --> <bean id="testList" class="test.Spring.helloworld.User">
<property name="list">
<list>
<value>list1</value>
<value>list2</value>
<value>list3</value>
</list>
</property>
</bean>
<!-- configure the map -->
<bean id="testMap" class="test.Spring.helloworld.User">
<property name="map">
<map>
<entry key="first" value="1"></entry>
<entry key="second" value="2"></entry>
<entry key="third" value="3"></entry>
</map>
</property>
</bean>
3.Properties类型的bean
实体类示例:
package test.Spring.helloworld;import java.util.Properties;
public class DataSource {
@Override
public String toString() {
return "Properties [properties=" + properties + "]";
}
public Properties getProperties() {
return properties;
}
public void setProperties(Properties properties) {
this.properties = properties;
}
private Properties properties;
}
配置示例:
<!-- configure the properties --> <bean id="dataSource1" class="test.Spring.helloworld.DataSource">
<property name="properties">
<props>
<prop key="user">root</prop>
<prop key="password">1234</prop>
<prop key="jdbcUrl">jdbc:mysql:///test</prop>
<prop key="driverClass">com.mysql.jdbc.Driver</prop>
</props>
</property>
</bean>
4.使用Util定义引用其他bean的公共集合
需要先在xml导入命名空间
<?xml version="1.0" encoding="UTF-8"?><beans xmlns="http://www.springframework.org/schema/beans"
xmlns:xsi="http://www.w3.org/2001/XMLSchema-instance"
xsi:schemaLocation="http://www.springframework.org/schema/beans
http://www.springframework.org/schema/beans/spring-beans.xsd
http://www.springframework.org/schema/util
http://www.springframework.org/schema/util/spring-util-4.0.xsd"
xmlns:util="http://www.springframework.org/schema/util"
>
</beans>
集合以及调用的xml配置
<!-- if properties of collection are beans --> <util:list id="users">
<ref bean="User"/>
<ref bean="User"/>
<ref bean="User"/>
</util:list>
<bean id="Users" class="test.Spring.helloworld.Users">
<property name="list">
<ref bean="users"/>
</property>
</bean>
5.使用p简化bean的属性赋值
首先,导入p的命名空间
xmlns:p="http://www.springframework.org/schema/p"实体类实例:
package test.Spring.helloworld;import java.util.List;
import java.util.Map;
public class User {
@Override
public String toString() {
return "User [id=" + id + ", name=" + name + "]";
}
public int getId() {
return id;
}
public void setId(int id) {
this.id = id;
}
public String getName() {
return name;
}
public void setName(String name) {
this.name = name;
}
private int id;
private String name;
}
配置示例:
<!-- use p to write the bean quickly and conveniently --> <bean id="User1" class="test.Spring.helloworld.User" p:id="2" p:name="jayjay2" />
6.abstract模板bean
设置abstract=true表明此bean是模板bean,为其他bean提供属性值模板
<!-- template bean --> <bean abstract="true" id="template" p:id="50" p:name="fromTemplate"></bean>
<bean id="User2" parent="template" class="test.Spring.helloworld.User"></bean>
7.单例bean和原型bean
<!-- use scope to build singleton/prototype bean --> <bean id="User3" parent="template" scope="singleton" class="test.Spring.helloworld.User"></bean>
<bean id="User4" parent="template" scope="prototype" class="test.Spring.helloworld.User"></bean>
singleton:此bean为单例,在context创建时已经创建,并且只有一个实例。
prototype:当需要时创建实例。
8.静态工厂方法配置bean
静态工厂类示例:
package test.Spring.FactoryBean;import java.util.HashMap;
import java.util.Map;
public class StaticFactoryMethod {
public static Map<String,Person> map = new HashMap<String,Person>();
static {
map.put("first", new Person(1,"jayjay1"));
map.put("second", new Person(2,"jayjay2"));
}
public static Person getPerson(String key){
return map.get(key);
}
}
配置示例:
<!-- static factory method --> <bean id="person" factory-method="getPerson" class="test.Spring.FactoryBean.StaticFactoryMethod">
<constructor-arg value="first" type="java.lang.String"></constructor-arg>
</bean>
9.实例工厂方法配置bean
工厂类示例:
package test.Spring.FactoryBean;import java.util.HashMap;
import java.util.Map;
public class InstanceFactoryMethod {
public static Map<String,Person> map = new HashMap<String,Person>();
static {
map.put("first", new Person(1,"jayjay1"));
map.put("second", new Person(2,"jayjay2"));
}
public Person getPerson(String key){
return map.get(key);
}
}
配置示例:
<!-- instance factory method --> <bean id="InstanceFactoryMethod" class="test.Spring.FactoryBean.InstanceFactoryMethod"></bean>
<bean id="person1" factory-bean="InstanceFactoryMethod" factory-method="getPerson">
<constructor-arg value="second"></constructor-arg>
</bean>
10.通过实现FactoryBean完成bean的配置
需要对FactoryBean接口的3个方法进行适当重写
PersonFactoryBean类示例:
package test.Spring.FactoryBean;import org.springframework.beans.factory.FactoryBean;
public class PersonFactoryBean implements FactoryBean<Person>{
public int getId() {
return id;
}
public void setId(int id) {
this.id = id;
}
public String getName() {
return name;
}
public void setName(String name) {
this.name = name;
}
private int id;
private String name;
@Override
public Person getObject() throws Exception {
// TODO Auto-generated method stub
return new Person(id,name);
}
@Override
public Class<?> getObjectType() {
// TODO Auto-generated method stub
return Person.class;
}
@Override
public boolean isSingleton() {
// TODO Auto-generated method stub
return false;
}
}
配置示例:
<!-- use factory bean to get a instance --> <bean id="person2" class="test.Spring.FactoryBean.PersonFactoryBean">
<property name="id" value="3"></property>
<property name="name" value="FactoryBean"></property>
</bean>
四、通过注解配置bean
加上注解的类会被Spring容器管理
@Component
标注于通用实体类
@Controller
标注于Controller/Action
@Service
标注于Service
@Respository
标注于RespositoryImpl/DaoImlp
@Autowired
依据类型自动装配
@Qualifier
指定自动装载的bean的name
1.在Spring配置文件中导入context命名空间,并加入
<context:component-scan base-package="test.Spring.Annotation"></context:component-scan>表示Spring将扫描test.Spring.Annotation及其子包中所有java文件,并将带有注解的类加入Spring容器进行管理。
例如:
<?xml version="1.0" encoding="UTF-8"?><beans xmlns="http://www.springframework.org/schema/beans"
xmlns:xsi="http://www.w3.org/2001/XMLSchema-instance"
xsi:schemaLocation="http://www.springframework.org/schema/beans
http://www.springframework.org/schema/beans/spring-beans.xsd
http://www.springframework.org/schema/context
http://www.springframework.org/schema/context/spring-context.xsd"
xmlns:context="http://www.springframework.org/schema/context">
<context:component-scan base-package="test.Spring.Annotation"></context:component-scan>
</beans>
2.模拟三层,并用Spring注解方式注入
项目结构:
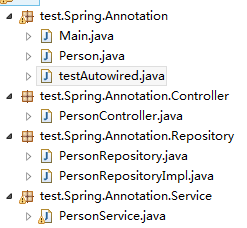
Person实体类
package test.Spring.Annotation;import org.springframework.stereotype.Component;
@Component
public class Person {
@Override
public String toString() {
return "Person [id=" + id + ", name=" + name + "]";
}
public int getId() {
return id;
}
public void setId(int id) {
this.id = id;
}
public String getName() {
return name;
}
public void setName(String name) {
this.name = name;
}
private int id;
private String name;
}
PersonController
package test.Spring.Annotation.Controller;import org.springframework.stereotype.Controller;
@Controller
public class PersonController {
public void excute(){
System.out.println("PersonController.excute()...");
}
}
PersonService
package test.Spring.Annotation.Service;import org.springframework.stereotype.Service;
@Service
public class PersonService {
public void add(){
System.out.println("PersonService.add()...");
}
}
PersonRepository接口
package test.Spring.Annotation.Repository;public interface PersonRepository {
void add();
}
PersonRepositoryImpl接口实现类
package test.Spring.Annotation.Repository;import org.springframework.stereotype.Repository;
@Repository
public class PersonRepositoryImpl implements PersonRepository {
@Override
public void add() {
System.out.println("PersonRepositoryImpl.add()...");
}
}
Main类中测试
package test.Spring.Annotation;import org.springframework.context.ApplicationContext;
import org.springframework.context.support.ClassPathXmlApplicationContext;
import test.Spring.Annotation.Controller.PersonController;
import test.Spring.Annotation.Repository.PersonRepository;
import test.Spring.Annotation.Service.PersonService;
public class Main {
public static void main(String[] args) {
ApplicationContext context =new ClassPathXmlApplicationContext("applicationContextForAnnotation.xml");
//inject the common bean
System.out.println(context.getBean("testAutowired"));
//inject the repository
PersonRepository pr = (PersonRepository)context.getBean("personRepositoryImpl");
pr.add();
//inject the controller
PersonController pc = (PersonController)context.getBean("personController");
pc.excute();
//inject the service
PersonService ps = (PersonService)context.getBean("personService");
ps.add();
}
}
3.泛型三层的注入
Spring配置文件
<?xml version="1.0" encoding="UTF-8"?><beans xmlns="http://www.springframework.org/schema/beans"
xmlns:xsi="http://www.w3.org/2001/XMLSchema-instance"
xsi:schemaLocation="http://www.springframework.org/schema/beans
http://www.springframework.org/schema/beans/spring-beans.xsd
http://www.springframework.org/schema/context
http://www.springframework.org/schema/context/spring-context.xsd
"
xmlns:context="http://www.springframework.org/schema/context"
>
<context:component-scan base-package="test.Spring.Generic.di"></context:component-scan>
</beans>
BaseRespository
package test.Spring.Generic.di;public class BaseRepository<T> {
public void save() {
System.out.println("repository.save()...");
}
}
PersonRepository
package test.Spring.Generic.di;public interface PersonRespository {
void save();
}
PersonRepositoryImpl
继承BaseRepository就不需要再写一次save方法,且同时实现了PersonRepository接口
package test.Spring.Generic.di;import org.springframework.stereotype.Repository;
import test.Spring.Annotation.Person;
@Repository
public class PersonRespositoryImpl extends BaseRepository<Person> implements PersonRespository {
}
BaseService对Dao进行自动装配,子类继承后装配的是子类Respository
package test.Spring.Generic.di;import org.springframework.beans.factory.annotation.Autowired;
public class BaseService<T> {
@Autowired
protected BaseRepository<T> baseRespository;
public void save(){
System.out.println("service.save()...");
System.out.println(baseRespository);
}
}
PersonService继承了BaseService,就不需要再写实现save方法,定义Repository字段了
package test.Spring.Generic.di;import org.springframework.stereotype.Service;
import test.Spring.Annotation.Person;
@Service
public class PersonService extends BaseService<Person>{
}
Main类中调用
package test.Spring.Generic.di;import org.springframework.context.ApplicationContext;
import org.springframework.context.support.ClassPathXmlApplicationContext;
public class Main {
public static void main(String[] args) {
ApplicationContext context =new ClassPathXmlApplicationContext("applicationContextForGeneric.xml");
PersonService ps = (PersonService)context.getBean("personService");
ps.save();
}
}
输出为

第二句说明调用的是继承BaseService的PersonService拿到的Respository是PersonRepositoryImpl,说明泛型注入成功。
十、使用SpringAOP完成简单的程序
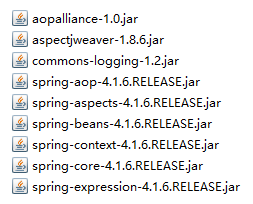
1.导入SpringAOP所需jar包
2.编写spring的配置文件applicationContext.xml
<?xml version="1.0" encoding="UTF-8"?><beans xmlns="http://www.springframework.org/schema/beans"
xmlns:xsi="http://www.w3.org/2001/XMLSchema-instance"
xsi:schemaLocation="http://www.springframework.org/schema/beans
http://www.springframework.org/schema/beans/spring-beans.xsd
http://www.springframework.org/schema/util
http://www.springframework.org/schema/util/spring-util-4.0.xsd
http://www.springframework.org/schema/context
http://www.springframework.org/schema/context/spring-context.xsd
http://www.springframework.org/schema/aop
http://www.springframework.org/schema/aop/spring-aop.xsd
"
xmlns:util="http://www.springframework.org/schema/util"
xmlns:p="http://www.springframework.org/schema/p"
xmlns:context="http://www.springframework.org/schema/context"
xmlns:aop="http://www.springframework.org/schema/aop"
>
<!-- configure the package for spring to scan -->
<context:component-scan base-package="test.Spring.AOP" />
<!-- make the aspectj annotation to be used -->
<aop:aspectj-autoproxy></aop:aspectj-autoproxy>
</beans>
3.创建一个HelloWord接口以及它的实现类HelloWordImpl
public interface HelloWord { public int sayHello(int num);
}
@Component
public class HelloWordImpl implements HelloWord{
public int sayHello(int num){
System.out.println("hello word");
return 100/num;
}
}
4.SpringAOP注释的类型有5种
@Before 前置通知 在方法执行前执行
@After 后置通知 在方法执行后执行
@AfterThrowing 异常通知 在方法抛出异常之后执行
@AfterReturning 返回通知 在方法返回结果之后执行
@Around 环绕通知 环绕着方法执行
5.创建一个切面类(包含@Before @After @AfterThrowing @AfterReturning)
@Component@Aspect
public class HelloWordAspect {
@Before(value="execution(* test.Spring.AOP.HelloWord.sayHello(..))")
public void beforeMethod(JoinPoint jp){
String methodName = jp.getSignature().getName();
System.out.println(methodName);
System.out.println("before method execute,args are "+Arrays.toString(jp.getArgs()));
}
@After("execution(* test.Spring.AOP.HelloWord.sayHello(..))")
public void afterMethod(JoinPoint jp){
System.out.println("after method execute,args are "+Arrays.toString(jp.getArgs()));
}
@AfterThrowing(value="execution(* test.Spring.AOP.HelloWord.sayHello(..))",throwing="ex")
public void afterThrow(Exception ex){
System.out.println("afterThrow"+ex.getMessage());
}
@AfterReturning(value="execution(* test.Spring.AOP.HelloWord.sayHello(..))",returning="result")
public void afterReturn(Object result){
System.out.println("the result is "+result);
}
}
6.在主函数调用
public class Main { public static void main(String[] args) {
ApplicationContext context = new ClassPathXmlApplicationContext("applicationContextForAOP.xml");
HelloWord hw = (HelloWord) context.getBean("helloWordImpl");
hw.sayHello(10);
}
}
7.调用结果
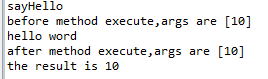
结果说明,在sayHello方法是被Spring代理执行了,执行前后加上了一些切面类中定义的信息。
8.使用Around环绕通知切面类实现类似效果
@Component@Aspect
public class HelloWordAspectAround {
@Around(value="execution(* test.Spring.AOP.HelloWord.sayHello(..)))")
public Object aroundMethod(ProceedingJoinPoint pjp){
Object result = null;
String methodName = pjp.getSignature().getName();
try {
result = pjp.proceed();
System.out.println("the result is "+result);
} catch (Throwable e) {
System.out.println("Exception occurs : "+e.getMessage());
throw new RuntimeException(e);
}
System.out.println(methodName+" end");
return result;
}
}
十一、SpringAOP整合Hibernate并使用事务(模拟买书的过程)
1.内容准备
①.编写实体类
Book
public class Book { public int getId() {
return id;
}
public void setId(int id) {
this.id = id;
}
public String getName() {
return name;
}
public void setName(String name) {
this.name = name;
}
public int getPrice() {
return price;
}
public void setPrice(int price) {
this.price = price;
}
public int getCount() {
return count;
}
public void setCount(int count) {
this.count = count;
}
private int id;
private String name;
private int price;
private int count;
}
Customer
public class Customer { public int getId() {
return id;
}
public void setId(int id) {
this.id = id;
}
public String getName() {
return name;
}
public void setName(String name) {
this.name = name;
}
public int getBalance() {
return balance;
}
public void setBalance(int balance) {
this.balance = balance;
}
private int id;
private String name;
private int balance;
}
②.编写实体类映射文件
<hibernate-mapping package="springaop.model"> <class name="Book" table="t_book">
<id name="id" type="int" column="id" >
<generator class="native"></generator>
</id>
<property name="name" type="string" column="name"/>
<property name="price" type="int" column="price"/>
<property name="count" type="int" column="count"/>
</class>
</hibernate-mapping>
<hibernate-mapping package="springaop.model">
<class name="Customer" table="t_customer">
<id name="id" type="int" column="id" >
<generator class="native"></generator>
</id>
<property name="name" type="string" column="name"/>
<property name="balance" type="int" column="balance"/>
</class>
</hibernate-mapping>
③.编写dao及daoImpl
public interface ShopRepository { public int findBookPriceByBookName(String name);
public void updateBookCount(String name);
public void updateUserBalance(String name,int price);
}
@Repository
public class ShopRepositoryImpl implements ShopRepository{
@Autowired
private SessionFactory sessionFactory;
private Session getSession(){
return sessionFactory.getCurrentSession();
}
@Override
public int findBookPriceByBookName(String name) {
String sql = "select b.price from Book b where b.name=?";
Query query = getSession().createQuery(sql).setString(0, name);
return (Integer)query.uniqueResult();
}
@Override
public void updateBookCount(String name) {
String sql1 = "select b.count from Book b where b.name=?";
Query query = getSession().createQuery(sql1).setString(0,name);
int count = (int)query.uniqueResult();
if(count<=0){
throw new RuntimeException("库存不足");
}
String sql2 = "update Book b set b.count=b.count-1 where b.name=?";
getSession().createQuery(sql2).setString(0,name).executeUpdate();
}
@Override
public void updateUserBalance(String name, int price) {
String sql1 = "select c.balance from Customer c where c.name=?";
Query query = getSession().createQuery(sql1).setString(0,name);
int count = (int)query.uniqueResult();
if(count-price<0){
throw new RuntimeException("余额不足");
}
String sql2 = "update Customer c set c.balance=c.balance-? where c.name=?";
getSession().createQuery(sql2).setInteger(0, price).setString(1,name).executeUpdate();
}
}
④.编写service及serviceImpl
public interface ShopService { public void shop(String bookName,String username);
}
@Service
public class ShopServiceImpl implements ShopService{
@Autowired
private ShopRepository sr;
@Override
public void shop(String bookName, String username) {
int price = sr.findBookPriceByBookName(bookName);
sr.updateUserBalance(username, price);
sr.updateBookCount(bookName);
}
}
2.加入Hibernate
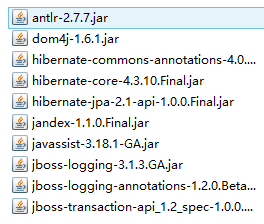
①.添加hibernate必须的jar包
②.添加hibernate.cfg.xml
<hibernate-configuration> <session-factory>
<!-- 配置hibernate的基本属性 -->
<!-- 1.数据源的配置,配置到SpringIOC中,此处不需要再进行配置 -->
<!-- 2.关联实体的映射文件 .hbm.xml文件也在IOC容器配置SessionFactory实例时配置 -->
<!-- 3.配置hibernate的基本属性 方言、sql显示及格式化、数据库表生成策略、二级缓存-->
<property name="dialect">org.hibernate.dialect.MySQL5InnoDBDialect</property>
<property name="show_sql">true</property>
<property name="hbm2ddl.auto">update</property>
<!-- 配置hibernate二级缓存相关 -->
</session-factory>
</hibernate-configuration>
3.加入Spring
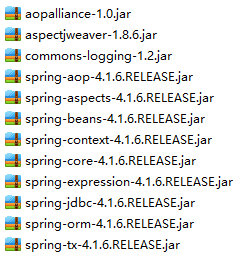
①.导入Spring必须的jar包
②.配置Spring的applicationContext.xml及db.properties文件
<beans xmlns="http://www.springframework.org/schema/beans" xmlns:xsi="http://www.w3.org/2001/XMLSchema-instance"
xsi:schemaLocation="http://www.springframework.org/schema/beans
http://www.springframework.org/schema/beans/spring-beans.xsd
http://www.springframework.org/schema/util
http://www.springframework.org/schema/util/spring-util-4.0.xsd
http://www.springframework.org/schema/context
http://www.springframework.org/schema/context/spring-context.xsd
http://www.springframework.org/schema/tx
http://www.springframework.org/schema/tx/spring-tx-4.1.xsd
http://www.springframework.org/schema/aop
http://www.springframework.org/schema/aop/spring-aop-4.1.xsd
"
xmlns:util="http://www.springframework.org/schema/util"
xmlns:p="http://www.springframework.org/schema/p"
xmlns:context="http://www.springframework.org/schema/context"
xmlns:tx="http://www.springframework.org/schema/tx"
xmlns:aop="http://www.springframework.org/schema/aop"
>
<!-- 配置Spring扫描的包 -->
<context:component-scan base-package="springaop"></context:component-scan>
<!-- 配置数据源 -->
<!-- 导入资源文件 -->
<context:property-placeholder location="classpath:db.properties"/>
<bean id="dataSource" class="com.mchange.v2.c3p0.ComboPooledDataSource">
<property name="user" value="${jdbc.user}"></property>
<property name="password" value="${jdbc.password}"></property>
<property name="driverClass" value="${jdbc.driverClass}"></property>
<property name="jdbcUrl" value="${jdbc.jdbcUrl}"></property>
<property name="initialPoolSize" value="${jdbc.initialPoolSize}"></property>
<property name="maxPoolSize" value="${jdbc.maxPoolSize}"></property>
</bean>
<!-- 配置Hibernete的SessionFactory实例 -->
<!-- 通过配置Spring提供的LcalSessionFactory -->
<bean id="sessionFactory" class="org.springframework.orm.hibernate4.LocalSessionFactoryBean">
<property name="dataSource" ref="dataSource"></property>
<property name="configLocation" value="classpath:hibernate.cfg.xml"></property>
<property name="mappingLocations" value="classpath:springaop/model/*.hbm.xml"></property>
</bean>
<!-- 配置Spring的声明式事务 -->
<!-- 1.配置事务管理器 -->
<bean id="transactionManager" class="org.springframework.orm.hibernate4.HibernateTransactionManager">
<property name="sessionFactory" ref="sessionFactory"></property>
</bean>
<!-- 2.配置事务属性 -->
<tx:advice id="txAdvice" transaction-manager="transactionManager">
<tx:attributes>
<tx:method name="*"/>
</tx:attributes>
</tx:advice>
<!-- 3.配置事务切点,并把切点和事务关联起来, -->
<aop:config>
<aop:pointcut expression="execution(* springaop.service.*.*(..))" id="txPointcut"/>
<aop:advisor advice-ref="txAdvice" pointcut-ref="txPointcut"/>
</aop:config>
</beans>
jdbc.user=root
jdbc.password=1234
jdbc.driverClass=com.mysql.jdbc.Driver
jdbc.jdbcUrl=jdbc:mysql:///test
jdbc.initialPoolSize=5
jdbc.maxPoolSize=10
4.运行测试
public class test { private ApplicationContext context = null;
private ShopService ss = null;
{
context = new ClassPathXmlApplicationContext("applicationContext.xml");
ss= context.getBean(ShopService.class);
}
@Test
public void test() throws SQLException{
DataSource ds = context.getBean(DataSource.class);
System.out.println(ds.getConnection());
}
@Test
public void test1(){
ss.shop("Java", "jayjay");
}
@Test
public void test3(){
ss.shop("C", "jayjay");
}
}
当钱不够的时候,会抛出异常“余额不足”,并且事务回滚;当钱足够时,正常执行。
本文内容总结:Spring学习总结----,一、导入Spring必须的jar包,二、简单示例入门注入一个User,三、Bean的配置深入,四、通过注解配置bean,十、使用SpringAOP完成简单的程序,十一、SpringAOP整合Hibernate并使用事务(模拟买书的过程),
原文链接:https://www.cnblogs.com/sunniest/p/4543271.html
以上是 Spring详细教程 的全部内容, 来源链接: utcz.com/z/296351.html