spring_装配Bean
本文内容纲要:spring_装配Bean
Spring容器:
Spring有两种不同的容器,一个是org.springframework.beans.factory.BeanFactory接口实现,另一个是应用上下文org.springframework.context.ApplicationContext接口实现.
BeanFactory是简单的容器,提供了基础的依赖注入,ApplicationContext是建立在BeanFactory基础之上的,它是Beanfactory的子类,功能比BeanFactory更加强大。
ApplicationContext提供了更多功能:
提供了文本信息解析工具,包括对国际化的支持
提供了载入文件资源的通用方法,如载入图片
可以向注册为监听器的Bean发送事件
ApplicationContext经常用到的三种实现:ClassPathXmlApplicationContext, FileSystemXmlApplicationContext, XmlWebApplicationContext
使用BeanFactory示例:
1 BeanFactory factory = new XmlBeanFactory(new ClassPathResource(2 "beans.xml"));
3 UserSave usersave = (UserSave) factory.getBean("usersave");
使用ApplicationContext示例:
1 ApplicationContext context = new ClassPathXmlApplicationContext("beans.xml");2 UserSave usersave = (UserSave) context.getBean("usersave");
Bean的作用域:
作用域 | 描述 |
singleton | 在每个Spring IoC容器中一个bean定义对应一个对象实例。
|
prototype | 一个bean定义对应多个对象实例。
|
request | 在一次HTTP请求中,一个bean定义对应一个实例;即每次HTTP请求将会有各自的bean实例,它们依据某个bean定义创建而成。该作用域仅在基于web的Spring
|
session | 在一个HTTP
|
global session | 在一个全局的HTTP
|
示例:在beans.xml中
1 <bean id="usersave" class="com.yuan.test.UserSave" scope="singleton">2 <property name="user">
3 <ref bean="user" />
4 </property>
5 </bean>
第1行中scope属性定义bean的作用域,将其定义为singleton即为单例。下面代码输出为true
1 ApplicationContext context = new ClassPathXmlApplicationContext("beans.xml");2
3 UserSave usersave = (UserSave) context.getBean("usersave");
4 UserSave usersave2 = (UserSave) context.getBean("usersave");
5
6 System.out.println(usersave == usersave2);
同样可以测试其他的属性值。
依赖注入的方法:
- 接口注入
- 构造注入
- 设值注入
接口注入是要自定义的Bean实现规定的接口,Spring会自动进行注入,一般用的很少,下面是构造注入和设值注入的示例:
设值注入:
在Bean中为属性设置setter方法。
1 public class UserSave { 2 private User user;
3
4 public User getUser() {
5 return user;
6 }
7
8 public void setUser(User user) {
9 this.user = user;
10 }
11
12 public void saveUser() {
13 System.out.println("user saved!");
14 }
15 }
然后在配置文件中设置对应
1 <bean id="user" class="com.yuan.test.User"></bean>2
3 <bean id="usersave" class="com.yuan.test.UserSave" scope="singleton">
4 <property name="user">
5 <ref bean="user" />
6 </property>
7 </bean>
构造注入:
为bean提供构造函数。
1 public class UserSave {2 private User user;
3
4 public UserSave(User user) {
5 this.user = user;
6 }
7 }
修改配置文件,在
1 <bean id="usersave" class="com.yuan.test.UserSave" scope="singleton">2 <constructor-arg>
3 <ref bean="user" />
4 </constructor-arg>
5 </bean>
构造注入在有些情况下会遇到些问题,如果有多个参数,我们可以依据类型依次设置配置文件中的参数值,也可以调换顺序,不过要让Spring知道
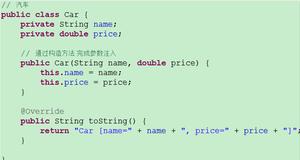
1 public class Student { 2 private String arg1;
3 private URL arg2;
4
5 public Student(String arg1, URL arg2) {
6 this.arg1 = arg1;
7 this.arg2 = arg2;
8 }
9
10 }
如下是按照顺序,http://www.baidu.com赋给第一个参数arg1, http://www.google.com赋给第二参数。
1 <bean id="student" class="com.yuan.test.Student">2 <constructor-arg>
3 <value>http://www.baidu.com</value>
4 </constructor-arg>
5 <constructor-arg>
6 <value>http://www.google.com</value>
7 </constructor-arg>
8 </bean>
也可以是随便编写参数的位置,不过要在属性中指定对应的参数位置,如下:
1 <bean id="student" class="com.yuan.test.Student">2 <constructor-arg index="1">
3 <value>http://www.baidu.com</value>
4 </constructor-arg>
5 <constructor-arg index="0">
6 <value>http://www.google.com</value>
7 </constructor-arg>
8 </bean>
在
1 <bean id="student" class="com.yuan.test.Student">2 <constructor-arg type="java.net.URL">
3 <value>http://www.baidu.com</value>
4 </constructor-arg>
5 <constructor-arg type="java.lang.String">
6 <value>http://www.google.com</value>
7 </constructor-arg>
8 </bean>
如上,也可以通过type属性设置对应构造函数中的参数类型,不过如果构造函数中有相同的类型参数,这种方法不可取。
自动装配:
关于自动装配,个人觉得不够细粒度,如果为了系统稳定最好还是手工编写好。可以参考文章:了解Spring自动装配
Spring中特殊的Bean:
参考文章:Spring笔记 (2) 特殊Bean
分散配置:
在项目开发中,有时候要从一些配置文件中(properties)读取一些配置信息,如数据库的连接信息。在Spring程序中可以从不同的properties中读取有用的信息。这里要用到org.springframeword.beans.factory.config.PropertyPlaceholderConfigurer类,它是BeanFactoryPostProcessor的实现类.
下面例子:
项目结构:
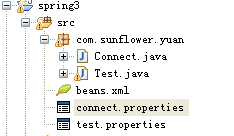
connet.properties:
driver=mysqlusername=yuan
password=test
test.properties:
1 age=122 height=13
3 weight=14
Connect.java装载着两个properties的信息:
public class Connect { private String driver;
private String username;
private String password;
int age;
int height;
int weight;
//省略getter,setter
}
beans.xml:
1 <?xml version="1.0" encoding="UTF-8"?> 2 <beans xmlns="http://www.springframework.org/schema/beans"
3 xmlns:xsi="http://www.w3.org/2001/XMLSchema-instance" xmlns:p="http://www.springframework.org/schema/p"
4 xsi:schemaLocation="http://www.springframework.org/schema/beans http://www.springframework.org/schema/beans/spring-beans-2.5.xsd">
5
6 <bean id="propertyConfigurer"
7 class="org.springframework.beans.factory.config.PropertyPlaceholderConfigurer">
8 <property name="locations">
9 <list>
10 <value>connect.properties</value>
11 <value>test.properties</value>
12 </list>
13 </property>
14 </bean>
15
16 <bean id="connect" class="com.sunflower.yuan.Connect">
17 <property name="driver">
18 <value>${driver}</value>
19 </property>
20
21 <property name="username">
22 <value>${username}</value>
23 </property>
24
25 <property name="password">
26 <value>${password}</value>
27 </property>
28
29 <property name="age">
30 <value>${age}</value>
31 </property>
32
33 <property name="height">
34 <value>${height}</value>
35 </property>
36
37
38 <property name="weight">
39 <value>${weight}</value>
40 </property>
41 </bean>
42
43 </beans>
第6~14行中,
测试类Test.java:
public class Test { public static void main(String[] args) {
ApplicationContext context = new ClassPathXmlApplicationContext(
"beans.xml");
Connect source = (Connect) context.getBean("connect");
String username = source.getUsername();
String password = source.getPassword();
int age = source.getAge();
int weight = source.getWeight();
int height = source.getHeight();
System.out.println("username is:" + username + " password is:"
+ password);
System.out.println("age is:" + age + " weight is:" + weight
+ " height is:" + height);
}
}
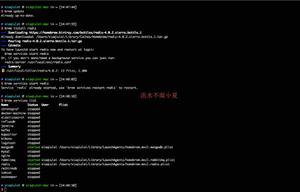
运行结果:

本文内容总结:spring_装配Bean
原文链接:https://www.cnblogs.com/hanyuan/archive/2012/09/21/2690549.html
以上是 spring_装配Bean 的全部内容, 来源链接: utcz.com/z/295916.html