分享一些可能会用到的原生前端CSS例子,要不进来看看?
前言
今天来分享一些原生的CSS或者是CSS+JS的实际例子,这些例子比较的简单,但是都是实际开发之中可能遇到的。相信还是会对部分童鞋有所帮助~
css时间轴效果
时间轴算是很常见效果,我们可以通过CSS的相对定位和绝对定位来实现,在开发的时候我们可以根据实际情况来调整各个属性的值,以满足需求。
效果:
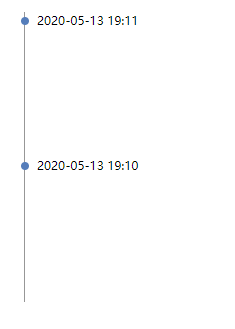
代码:
HTML
<div class="message_item"><div class="message_time">2020-05-13 19:11</div>
<sapn class="message_circle"></sapn>
</div>
<div class="message_item">
<div class="message_time">2020-05-13 19:10</div>
<sapn class="message_circle"></sapn>
</div>
CSS
.message_item{height: 145px;
width: 300px;
padding-left: 12px;
border-left: 1px solid #979797;
position: relative;
}
.message_time{
height: 17px;
line-height: 17px;
font-size: 12px;
margin-bottom: 12px;
}
.message_circle{
position: absolute;
width: 8px;
height: 8px;
background-color: #547ABD;
border-radius: 50%;
left: -4px;
top: 5px;
}
css实现信息框样式
对于信息框样式的实现,我们可以利用CSS伪类和CSS3 transform 属性来实现。
第一种
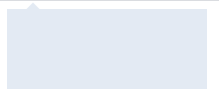
HTML
<div class="box"></div>CSS
.box{width: 200px;
height: 80px;
background: #E3EAF4;
position: relative;
}
.box::after{
content: ' ';
height: 12px;
width: 12px;
-webkit-transform: rotate(45deg);
transform: rotate(45deg);
top: -4px;
left: 20px;
position: absolute;
background: #E3EAF4;
}
信息框的指向可以在伪类中进行修改
第二种
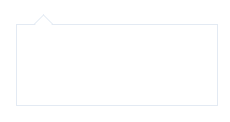
HTML
<div class="box"></div>CSS
.box{width: 200px;
height: 80px;
position: relative;
border: 1px solid #E3EAF4;
background-color: #ffffff;
}
.box::after{
content: ' ';
height: 12px;
width: 12px;
-webkit-transform: rotate(45deg);
transform: rotate(45deg);
top: -8px;
left: 20px;
position: absolute;
background-color: #ffffff;
border: 1px solid #E3EAF4;
border-bottom: none;
border-right: none;
}
上面两种其实就是设备背景色和设置边框的区别。前面的时间轴和信息框组合起来就可以完成一个完整的信息时间轴的例子。
CSS容量球效果
这里的波浪效果参考了chokcoco大佬的文章纯 CSS 实现波浪效果!
效果
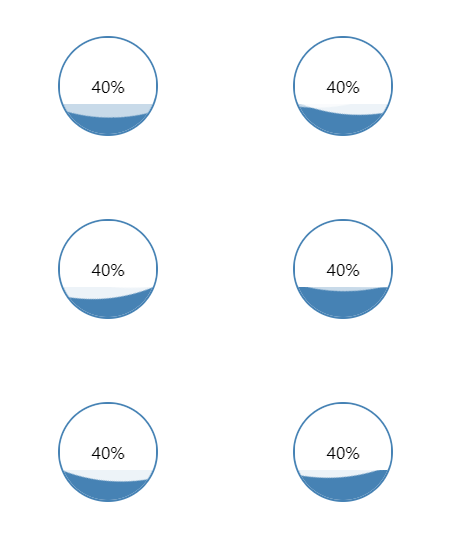
HTML
<div class="box"><div class="circular">
<div class="content">
</div>
<span class="num">40%</span>
</div>
</div>
CSS
.box{height: 500px;
padding-top: 100px;
padding-left: 200px;
}
.circular{
height: 100px;
width: 100px;
border: 2px solid #4682B4;
border-radius: 50%;
overflow: hidden;
box-sizing: border-box;
position: relative;
}
.num{
position: absolute;
left: 50%;
top: 50%;
z-index: 30;
transform: translate(-50%,-50%);
}
.content{
position: absolute;
height: 30px;
width: 100px;
background: #4682B4;
bottom: 0px;
}
.content::after, .content::before{
content: "";
position: absolute;
width: 400px;
height: 400px;
top: 0;
left: 50%;
background-color: rgba(255, 255, 255, .7);
border-radius: 40% 42% 40% 41%;
transform: translate(-50%, -100%) rotate(0);
animation: rotate 8s linear infinite;
z-index: 10;
}
.content::after{
border-radius: 42% 40% 41% 40%;
background-color: rgba(255, 255, 255, .9);
transform: translate(-50%, -100%) rotate(0);
animation: rotate 8s linear -5s infinite;
z-index: 20;
}
@keyframes rotate {
50% {
transform: translate(-50%, -103%) rotate(180deg);
} 100% {
transform: translate(-50%, -100%) rotate(360deg);
}
}
容量球内容量的高度就是.content的div的高度,波浪的幅度大小和波浪翻滚速度都是可以通过设置属性的值来实现。在实际运用的时候,我们基本上只需要动态设置.content的height,就能实现不同容量的展示。
移动端抽屉式导航
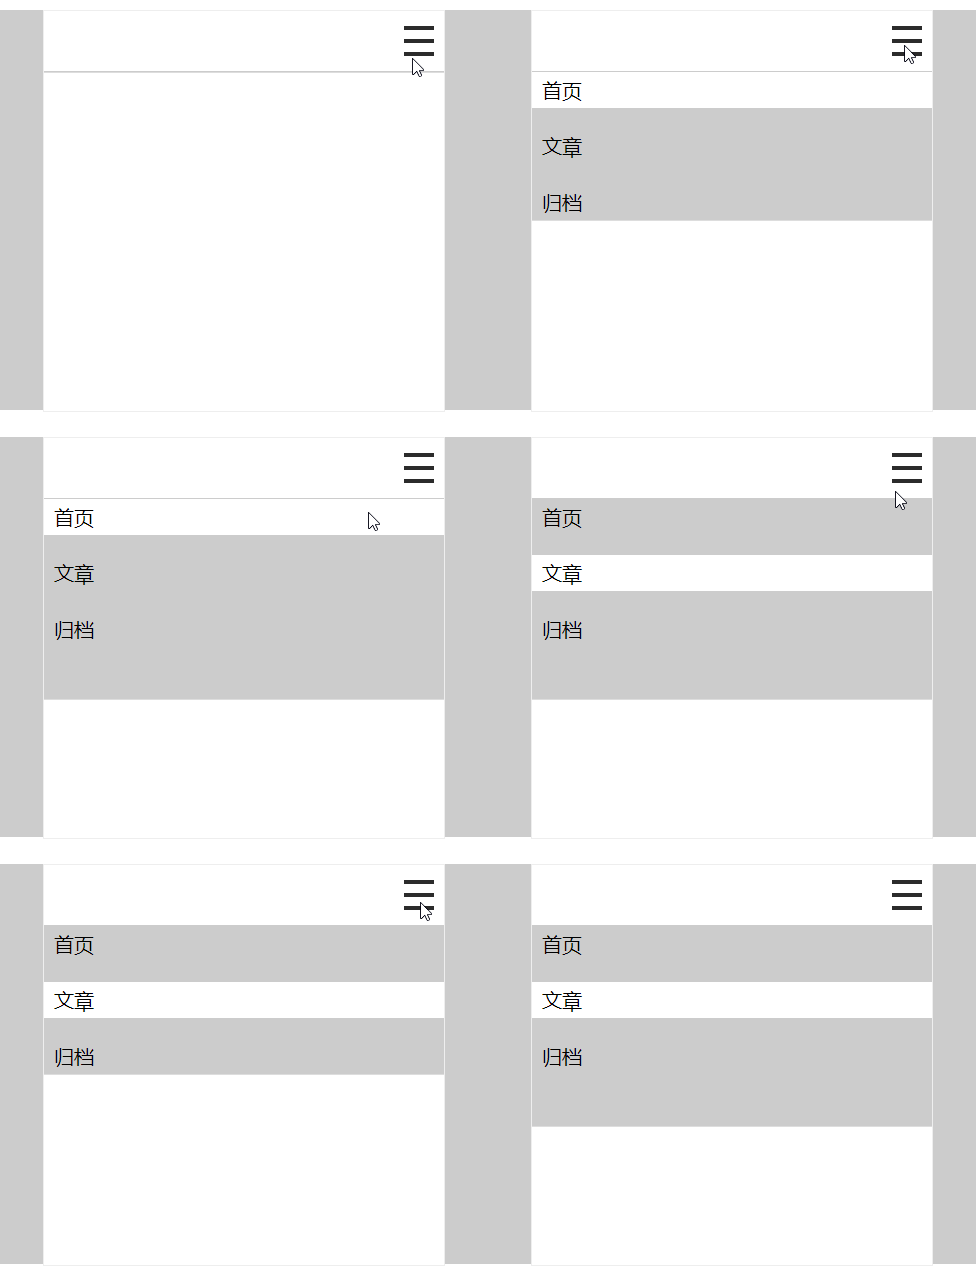
移动端导航多种多样,抽屉式导航就是常见之一,下面我们通过javascript和css相结合来实现移动端的抽屉式导航
效果:
HTML
<div id="root"><div class="box">
<div class="btn-box">
<button id="btn" class="btn">
<span></span>
<span></span>
<span></span>
</button>
</div>
<div id="content-box" class="content-box">
<ul class="content-ul">
<li class="content-li active">首页</li>
<li class="content-li">文章</li>
<li class="content-li">归档</li>
</ul>
</div>
</div>
</div>
CSS
抽屉式导航的核心就是通过css3的transition实现导航栏高度的变化过渡;还需要注意的是,虽然父元素高度发生变化,但是子元素如果有固定高度或者有内容的话,布局还是会受到影响。所以我们就要把父元素的overflow设置为hidden,这样就不会出现子元素撑开父元素的情况。
#root{width: 100%;
height: 400px;
margin-top: 100px;
background: #cccccc;
}
*{
margin: 0;
padding: 0;
}
li{
list-style: none;
}
.box{
width: 400px;
border: 1px solid #eeeeee;
height: 100%;
margin: 0 auto;
background: #ffffff;
}
.btn-box{
width: 100%;
height: 60px;
display: flex;
justify-content: flex-end;
align-items: center;
border-bottom: 1px solid #cccccc;
}
.btn{
height: 40px;
width: 40px;
display: flex;
flex-direction: column;
flex-wrap: wrap;
justify-content: space-around;
border: none;
background: #ffffff;
outline: none;
}
.btn span{
display: inline-block;
height: 4px;
width: 30px;
background: #2b2b2b;
}
.content-box{
height: 0;
border-bottom: 1px solid #dddddd;
background: #cccccc;
overflow: hidden; /* 让子元素不能撑开父元素 */
transition:height ease-out .3s;
-webkit-transition:height ease-out .3s; /* Safari */
}
.content-li{
padding: 5px 10px;
margin-bottom: 20px;
font-size: 20px;
}
.active{
background: #ffffff;
}
JavaScript
let btn = document.getElementById("btn");let nav = document.getElementById("content-box");
let contentLi = document.getElementsByClassName("content-li");
let hide = true;
let length = contentLi.length;
/**
* 实现导航条抽屉式
*/
btn.addEventListener('click', function () {
if (hide){
nav.style.height = "200px";
hide = false;
} else {
nav.style.height = "0";
hide = true;
}
});
/**
* 导航选中效果
*/
for (let i = 0; i < length; i++ ){
contentLi[i].addEventListener('click', function () {
for (let j = 0; j < length; j++){
contentLi[j].classList.remove('active');
}
contentLi[i].classList.add('active');
})
}
最后
文章若有不足或有更好的实现方法,欢迎一起讨论~
以上是 分享一些可能会用到的原生前端CSS例子,要不进来看看? 的全部内容, 来源链接: utcz.com/a/30789.html

